レンジスライダー
Potatoでつまみが2つあるレンジスライダーのアノテーションを設定し、上限・下限、刻み幅、両端のラベルを指定して数値の範囲を選んでもらう方法を解説します。
レンジスライダーのアノテーションスキーマは、1つの値ではなく値の範囲を選べる、つまみが2つあるスライダーを提供します。年齢層、時間帯、信頼区間のように、答えが幅や区間になるタスクに向いています。
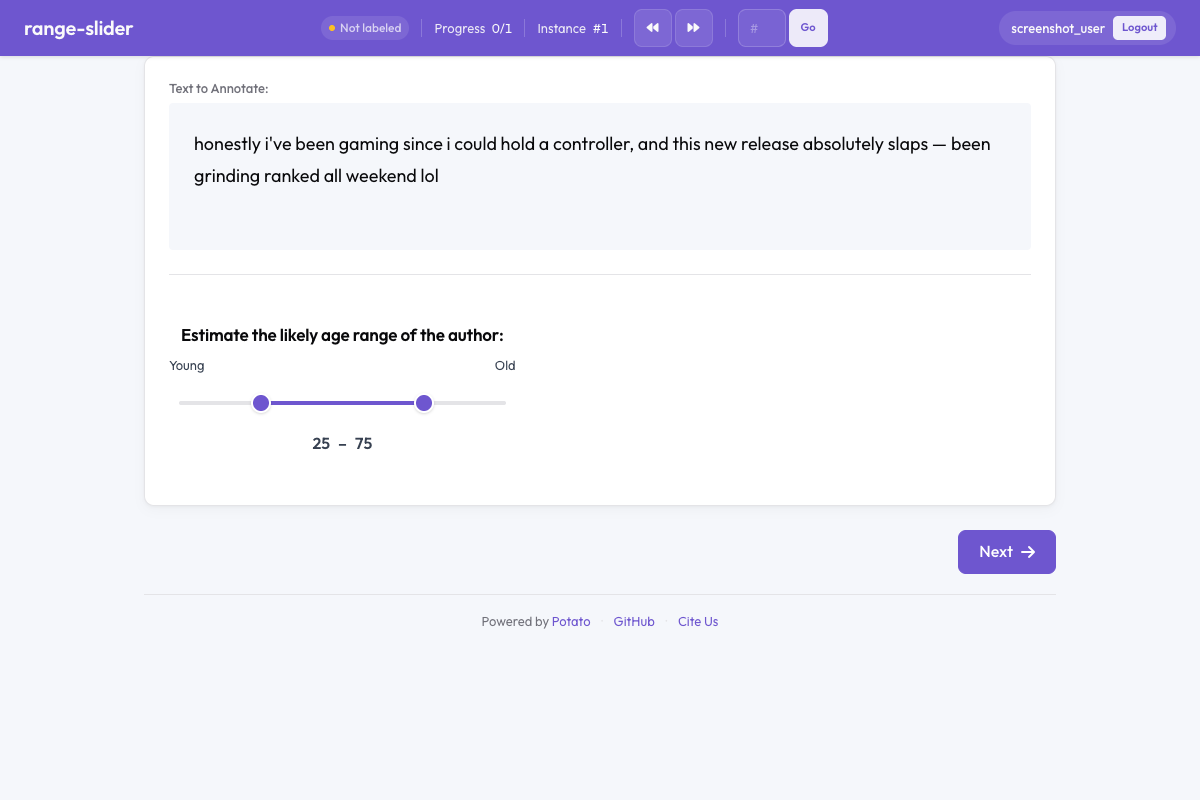 Range slider in Potato
概要
単一の値を取る通常のスライダーとは違い、レンジスライダーには範囲の下端と上端を表す2つのつまみがあります。アノテーターはどちらのつまみもドラッグして区間を決められます。現在の値はスライダーの横に表示されるので、細かい調整もできます。
クイックスタート
yaml
annotation_schemes:
  - annotation_type: range_slider
    name: age_range
    description: Estimate the age range of the author.
    min_value: 0
    max_value: 100
    step: 1
    left_label: "Young"
    right_label: "Old"
設定オプション
| フィールド | 型 | デフォルト | 説明 |
|---|---|---|---|
annotation_type | string | 必須 | "range_slider"を指定します |
name | string | 必須 | このスキーマの一意な識別子 |
description | string | 必須 | アノテーターに表示される指示文 |
min_value | number | 0 | スライダーの最小値 |
max_value | number | 100 | スライダーの最大値 |
step | number | 1 | 選択できる値の刻み幅 |
left_label | string | — | スライダー左端(最小値側)に表示するラベル |
right_label | string | — | スライダー右端(最大値側)に表示するラベル |
show_values | boolean | true | 現在選択されている下端と上端の値を表示するか |
default_low | number | — | 下端のつまみの初期位置 |
default_high | number | — | 上端のつまみの初期位置 |
label_requirement.required | boolean | false | 次に進む前にアノテーションを完了させる必要があるか |
例
年齢層の推定
yaml
annotation_schemes:
  - annotation_type: range_slider
    name: age_estimate
    description: What age range do you think the author falls in?
    min_value: 13
    max_value: 90
    step: 1
    left_label: "Younger"
    right_label: "Older"
信頼区間
yaml
annotation_schemes:
  - annotation_type: range_slider
    name: confidence_interval
    description: Select the range within which you believe the true value falls.
    min_value: 0
    max_value: 100
    step: 5
    left_label: "0%"
    right_label: "100%"
    show_values: true
時間帯
yaml
annotation_schemes:
  - annotation_type: range_slider
    name: time_window
    description: When during the day is this activity most likely? (hours)
    min_value: 0
    max_value: 24
    step: 0.5
    left_label: "Midnight"
    right_label: "Midnight"
快適に感じる温度の範囲
yaml
annotation_schemes:
  - annotation_type: range_slider
    name: comfort_range
    description: What temperature range (°F) do you find comfortable?
    min_value: 40
    max_value: 110
    step: 1
    left_label: "Cold"
    right_label: "Hot"
    show_values: true
出力形式
json
{
  "age_estimate": {
    "labels": {
      "low": 28,
      "high": 42
    }
  }
}出力には必ずlowとhighの値が含まれ、いずれも設定したmin_valueからmax_valueの範囲に収まります。
ベストプラクティス
- 意味のある初期値を設定する -
default_lowとdefault_highを使い、全員が両端に張り付いてしまうのを避けてください - 刻み幅を適切に選ぶ - 精密さが必要なら細かい刻み(0.1)を、おおまかな推定なら粗い刻み(5、10)を使います
- 両端にラベルを付ける -
left_labelとright_labelがあると、数値だけでは伝わらない意味の手がかりになります - show_valuesは有効のままにする - 数値の表示があると、アノテーターは正確に選べます
- 本当に範囲が必要なときに使う - 値が1つで足りるなら、通常のスライダーを使ってください
参考資料
- スライダー - 単一値の連続アノテーション
- Likertスケール - 順序尺度による評価
- ソフトラベル - 確率分布の配分
実装の詳細については、ソースドキュメントを参照してください。