观察、暂停、回退:在 Potato 中实时观察编码智能体
用 Ollama、Anthropic API 或 Claude Agent SDK 搭建实时编码智能体观察的教程,涵盖暂停、回滚、分支与轨迹导出。
实时观察不一样在哪
编码智能体的评估大多发生在事后:智能体跑完,留下一条 trace,评审者事后对着录像逐帧挑毛病。实时观察反过来。标注者看着智能体当场干活,每一次文件编辑、每一条终端命令、每一步推理落下来的时候就看见了。
这改变了你能做的事。如果智能体开始往错的方向走,标注者可以在它浪费时间之前介入。可以先暂停,把 diff 仔细读完再让它继续,也可以用一句大白话把它拉回来。我觉得最有用的是回滚:在之前任意一个检查点上回退,让智能体换个思路重来。这些分支正是偏好学习想要的数据。
这并不是要取代静态 trace 标注。它是另一种模式,产出另一类数据。想以可预测的成本拿到大量数据,静态标注更合适;想要针对性的数据、想搞清楚智能体是怎么失败的,或者想构造分支偏好对,实时观察更合适。
完整的功能参考见源文档。
实时编码智能体界面会实时推送智能体的动作,边干边显示代码 diff 和终端输出:
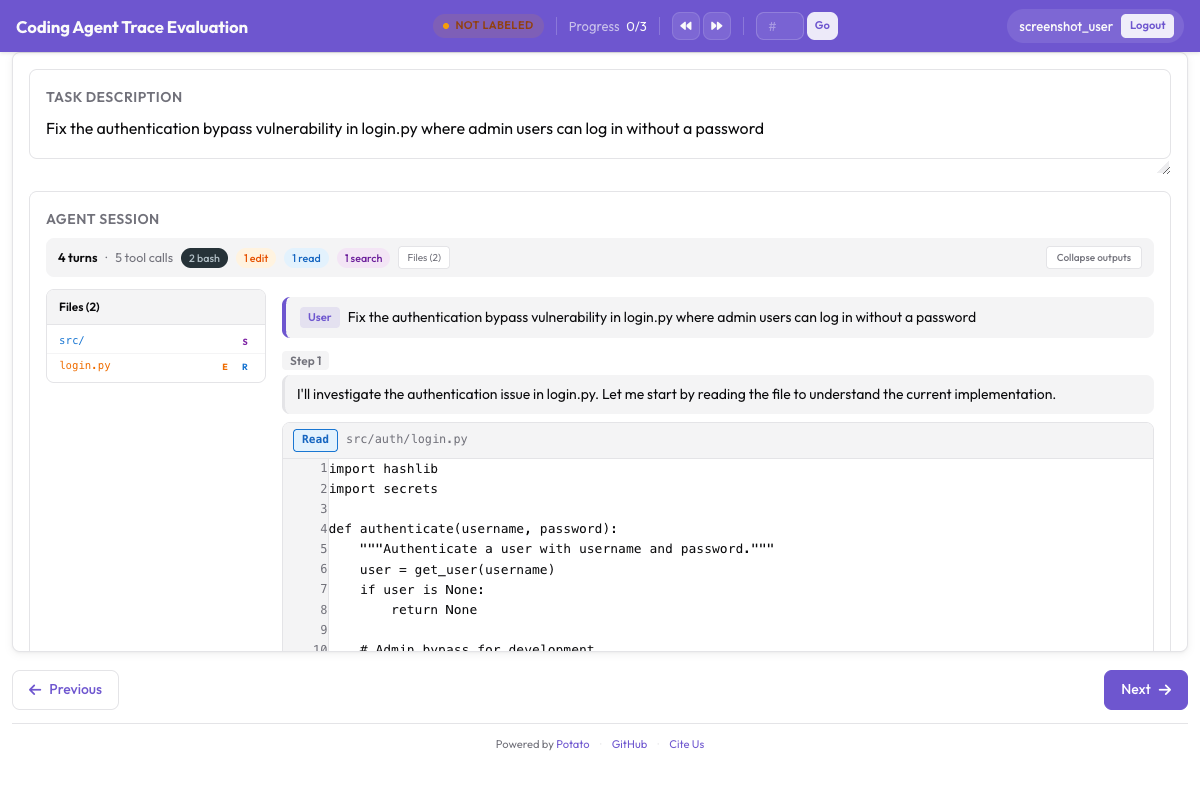 实时编码智能体观察,带实时 diff 渲染和终端输出
三种后端
Potato 为实时观察提供三种后端。每一种都在沙箱里运行编码智能体,并把它的动作实时推送到界面。
Ollama(完全本地)
Ollama 后端完全跑在你自己的机器上,不需要 API key,也不发网络请求。代码库比较敏感,或者你只是想试试水而不想烧 API 账单时,用它。
先安装 Ollama,拉一个支持工具调用的模型:
# Install Ollama
curl -fsSL https://ollama.ai/install.sh | sh

# Pull a coding-capable model
ollama pull qwen2.5-coder:32b

# Verify the model is available
ollama list
把 Potato 配置成使用 Ollama 后端:
# config.yaml
project_name: "Live Agent Observation - Ollama"
port: 8000

live_coding_agent:
  enabled: true
  backend: "ollama"
  ollama:
    model: "qwen2.5-coder:32b"
    host: "http://localhost:11434"
    temperature: 0.2
    max_tokens: 4096
    num_ctx: 32768               # Context window size
  sandbox:
    type: "docker"               # "docker" or "local"
    image: "python:3.11-slim"    # Base image for sandboxed execution
    workspace: "./workspace/"    # Agent's working directory
    timeout: 600                 # Max seconds per agent session
  streaming:
    update_interval_ms: 100      # How often to push updates to the UI
    buffer_output: true          # Buffer terminal output for smoother rendering
  checkpoints:
    enabled: true
    strategy: "git"              # Git-based checkpoints
    auto_commit_on_file_change: true
    commit_message_prefix: "[potato-checkpoint]"
Anthropic API(带工具调用的 Claude)
Anthropic API 后端接的是支持工具调用的 Claude 模型。推理和代码生成比大多数本地模型强,代价是 API 调用要花钱。
# Set your API key
export ANTHROPIC_API_KEY="sk-ant-..."# config.yaml
project_name: "Live Agent Observation - Claude"
port: 8000
live_coding_agent:
enabled: true
backend: "anthropic"
anthropic:
model: "claude-sonnet-4-20250514"
api_key_env: "ANTHROPIC_API_KEY"
max_tokens: 8192
temperature: 0.1
tools:
- "file_read"
- "file_edit"
- "bash_command"
- "directory_list"
- "file_search"
system_prompt: >
You are a coding agent. You will be given a task description and
access to a codebase. Use the provided tools to read files, make
edits, and run commands to complete the task. Think step by step
and verify your changes by running tests.
sandbox:
type: "docker"
image: "python:3.11-slim"
workspace: "./workspace/"
timeout: 900
allowed_commands: # Whitelist for bash commands
- "python"
- "pip"
- "pytest"
- "git"
- "ls"
- "cat"
- "find"
- "grep"
streaming:
update_interval_ms: 50
show_thinking: true # Show Claude's thinking in real time
checkpoints:
enabled: true
strategy: "git"
auto_commit_on_file_change: trueClaude Agent SDK(完整的 Claude Code 能力)
Claude Agent SDK 后端是三者中能力最强的,带完整的 Claude Code 工具集和自主行为。它需要 claude-agent-sdk 包。
# Install the Claude Agent SDK
pip install claude-agent-sdk# config.yaml
project_name: "Live Agent Observation - Claude Agent SDK"
port: 8000
live_coding_agent:
enabled: true
backend: "claude_agent_sdk"
claude_agent_sdk:
api_key_env: "ANTHROPIC_API_KEY"
model: "claude-sonnet-4-20250514"
max_turns: 50 # Maximum number of agent turns
permission_mode: "auto" # "auto", "ask", or "restricted"
allowed_tools:
- "Read"
- "Edit"
- "Write"
- "Bash"
- "Glob"
- "Grep"
restricted_commands: # Bash commands to block
- "rm -rf /"
- "sudo"
- "curl"
- "wget"
sandbox:
type: "docker"
image: "node:20-slim"
workspace: "./workspace/"
timeout: 1200
mount_volumes:
- "./test-repo:/workspace/repo"
streaming:
update_interval_ms: 50
show_thinking: true
show_tool_inputs: true
checkpoints:
enabled: true
strategy: "git"
auto_commit_on_file_change: true
max_checkpoints: 100标注流程
服务起来之后,一次实时观察会话会经过几个阶段。
开始一次会话
标注者打开 Potato 界面,看到一个任务描述输入框。他们把要交给智能体的任务粘贴或敲进去,比如“修复 tests/test_parser.py 中因新配置格式导致失败的测试”或者“给 /api/users 接口加上分页支持”。
# Start the server
potato start config.yaml -p 8000
标注者点击 “Start Agent”,编码智能体开始干活。每一个动作都会实时出现在 CodingTraceDisplay 面板里。
看着智能体工作
智能体运行时,每一步都会出现在 trace 视图中:
- 思考步骤显示为可折叠的灰色块,展示智能体的推理。
- 文件读取显示为带语法高亮的代码块,附行号和文件路径。
- 文件编辑显示为 unified diff,用红绿高亮。
- 终端命令显示为深色终端块,包含命令、输出和退出码。
- 文件树在侧边栏随文件的创建、修改、读取而更新。
顶部的进度条显示当前步数和已用时间。智能体的状态会显示为 “Thinking...”“Editing file...”“Running command...” 等。
暂停与指令控制
智能体运行期间,标注者可以通过控制栏介入:
Pause:在当前这一步做完之后冻结智能体。恢复之前它不会进入下一步。想在智能体往下走之前仔细看一段 diff 或终端输出时用它。
Send Instruction:在暂停期间(或者运行中)输入一段自然语言消息,注入到智能体的上下文里。例如:“不要改数据库 schema,用 migration”或者“改动之前先看看 /var/log/app.log 里的错误日志”。
Resume:暂停后继续执行。
Stop:直接结束这次智能体会话。到此为止的轨迹会被保存。
标注者可以在 trace 显示旁边用 PRM 标注来评价智能体的工作:
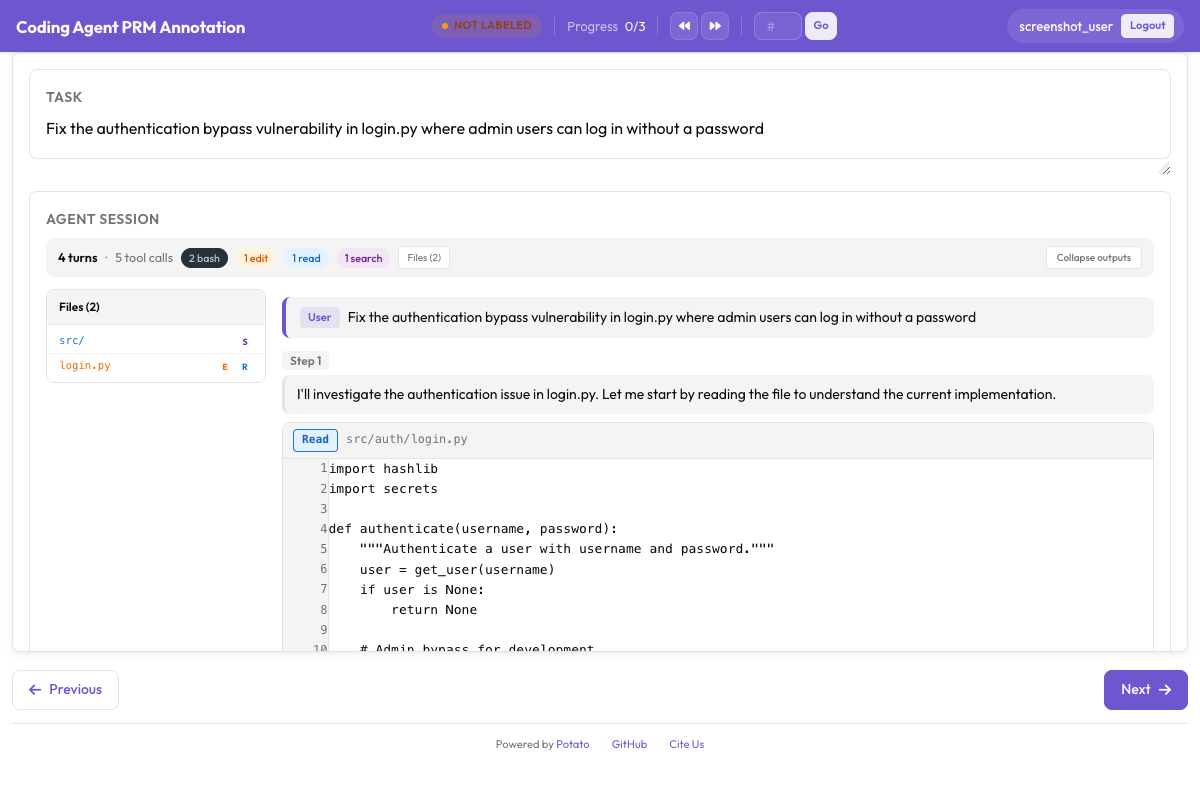 PRM 标注界面,在编码 trace 旁做步骤级正确性标注
# Control bar configuration
live_coding_agent:
  controls:
    pause_enabled: true
    instruction_enabled: true
    stop_enabled: true
    rollback_enabled: true
    branch_enabled: true
    pause_keyboard_shortcut: "Space"
    instruction_keyboard_shortcut: "i"
基于 git 的检查点系统
检查点系统是其余功能能成立的前提。回滚、分支和轨迹导出都靠它,而它的做法是在智能体每次改动文件之后提交一次 git。
工作方式
会话开始时,Potato 在沙箱工作区里初始化一个 git 仓库,或者直接用已有的那个。每次文件编辑之后自动提交,提交信息是结构化的:
[potato-checkpoint] Step 7: Edit src/parser.py
- Modified lines 45-52
- Agent reasoning: Fix the regex pattern to handle escaped quotes
结果是一条线性的提交历史,和轨迹中的步骤一一对应。每个检查点保存了那一刻工作区的完整状态。
# You can inspect checkpoints directly with git
cd workspace/
git log --oneline

# Output:
# f8a2c1d [potato-checkpoint] Step 12: Edit tests/test_parser.py
# 3b7e9f0 [potato-checkpoint] Step 10: Edit src/parser.py
# a1c4d8e [potato-checkpoint] Step 8: Edit src/parser.py
# 9e2f6b3 [potato-checkpoint] Step 5: Edit src/config.py
# 7d0a3c1 [potato-checkpoint] Step 0: Initial state
回滚
点击 “Rollback”,从下拉列表里挑一个更早的检查点。Potato 用 git checkout 把工作区重置到那个状态,轨迹显示也一起回退,然后智能体从那里继续,上下文被裁剪回那一步。
智能体走错路的时候就该这么办。与其看着它继续烧时间,不如回到上一个好状态让它重来,也可以顺手给一条指令把它引到更好的方向。
分支轨迹
分支就是保留两条路径的回滚。你回滚之后智能体换了走法,Potato 会创建一个命名的 git 分支,同时跟踪两条轨迹:
Step 0 → Step 1 → Step 2 → Step 3 → Step 4 (Branch A: original path)
                          ↘
                           Step 3' → Step 4' → Step 5' (Branch B: after rollback)
你可以从任意检查点分支,逐渐长出一整棵轨迹树。这对偏好学习非常有用,因为每一对分支本身就是一次已标注的比较:你之所以回滚,正是因为判定分支 A 走错了,那么从分支点往后,分支 B 就是被偏好的那条路。
# Branching configuration
live_coding_agent:
  branching:
    enabled: true
    max_branches_per_session: 10
    auto_name_branches: true     # "branch-A", "branch-B", etc.
    require_reason_on_rollback: true  # Annotator must explain why they rolled back
    compare_branches_view: true  # Side-by-side view of branch outcomes
导出格式
一次实时会话会产出详细的轨迹数据,你可以按训练目标导出成不同的形态。
线性轨迹导出
把每条分支导出为独立的轨迹:
potato export \
  --format trajectories \
  --project ./output/ \
  --output ./training_data/trajectories.jsonl \
--flatten_branches true{
"session_id": "session_001",
"branch": "branch-A",
"task": "Fix the failing test in tests/test_parser.py",
"steps": [
{"step_idx": 0, "type": "file_read", "path": "tests/test_parser.py", "...": "..."},
{"step_idx": 1, "type": "thinking", "content": "The test expects..."},
{"step_idx": 2, "type": "file_edit", "path": "src/parser.py", "diff": "..."},
{"step_idx": 3, "type": "bash_command", "command": "pytest tests/test_parser.py"}
],
"human_interventions": [
{"after_step": 2, "type": "instruction", "content": "Use a migration instead"}
],
"rollback_from_step": null,
"outcome": "resolved"
}从分支得到偏好对
把分支对导出为 DPO 或 RLHF 用的偏好数据:
potato export \
  --format branch_preferences \
  --project ./output/ \
--output ./training_data/branch_preferences.jsonl{
"session_id": "session_001",
"task": "Fix the failing test in tests/test_parser.py",
"branch_point_step": 2,
"branch_point_reason": "Agent started modifying the wrong file",
"rejected_branch": "branch-A",
"rejected_steps": [
{"step_idx": 3, "type": "file_edit", "path": "src/wrong_file.py", "...": "..."},
{"step_idx": 4, "type": "bash_command", "command": "pytest", "exit_code": 1}
],
"chosen_branch": "branch-B",
"chosen_steps": [
{"step_idx": 3, "type": "file_edit", "path": "src/parser.py", "...": "..."},
{"step_idx": 4, "type": "bash_command", "command": "pytest", "exit_code": 0}
]
}从实时观察得到 PRM 标签
实时观察可以和 PRM 标注配合,因为回滚点通常就是第一个出错的步骤:
potato export \
  --format prm_from_branches \
  --project ./output/ \
  --output ./training_data/prm_live.jsonl
这里被回滚掉的那一步会被标为首个错误,新分支上的步骤则标为正确,因为你接受了它们。
代码评审数据集
把标注者的指令和回滚理由导出为代码评审训练数据:
potato export \
  --format code_review \
  --project ./output/ \
  --output ./training_data/code_review.jsonl
完整快速上手
从零到跑起一个 Ollama 会话的全部步骤:
# 1. Install Potato with live agent support
pip install potato-annotation[live-agents]

# 2. Install and start Ollama
curl -fsSL https://ollama.ai/install.sh | sh
ollama pull qwen2.5-coder:32b

# 3. Set up a workspace with a repo to work on
mkdir -p workspace/
git clone https://github.com/example/test-project workspace/repo

# 4. Create the config file
cat > config.yaml << 'YAML'
project_name: "Live Agent Observation"
port: 8000

live_coding_agent:
  enabled: true
  backend: "ollama"
  ollama:
    model: "qwen2.5-coder:32b"
    host: "http://localhost:11434"
    temperature: 0.2
    num_ctx: 32768
  sandbox:
    type: "local"
    workspace: "./workspace/repo"
    timeout: 600
  streaming:
    update_interval_ms: 100
  checkpoints:
    enabled: true
    strategy: "git"
    auto_commit_on_file_change: true
  controls:
    pause_enabled: true
    instruction_enabled: true
    rollback_enabled: true
    branch_enabled: true
  branching:
    enabled: true
    max_branches_per_session: 5
    require_reason_on_rollback: true

annotation_schemes:
  - annotation_type: radio
    name: outcome
    label: "Final outcome"
    options:
      - value: "resolved"
        text: "Task Fully Resolved"
      - value: "partial"
        text: "Partially Resolved"
      - value: "failed"
        text: "Failed"

  - annotation_type: text_input
    name: notes
    label: "Session Notes"
    placeholder: "Key observations about agent behavior..."
    required: false

output:
  path: "./output/"
  format: "jsonl"
  export_formats:
    - "trajectories"
    - "branch_preferences"
    - "prm_from_branches"

annotators:
  - username: "observer1"
    password: "observer_pw_1"
YAML

# 5. Start Potato
potato start config.yaml -p 8000

# 6. Open http://localhost:8000 in your browser
登录之后,粘贴一个任务,比如“给 /api/users 的 POST 接口加上输入校验”,然后点 “Start Agent”。看着它干活,觉得不对就暂停,发指令把它引开,回滚去试别的做法。做完之后给结果打分,记下笔记。
实践建议
任务要清晰、有边界。 最合适的是让智能体做 5 到 15 分钟的活。再短,轨迹不够长,不值得标注;长太多,标注者会累。
生产环境用 Docker 沙箱。 开发阶段用本地沙箱模式没问题,但 Docker 能挡住智能体去动你的宿主机。面对不可信的模型时一定要用。
记录回滚理由。 打开 require_reason_on_rollback,让每个分支点都带上一条人写的说明,讲清楚哪里出了问题。这些说明本身就是有用的训练信号,也让偏好数据质量更好。
多后端对比。 同一批任务分别用 Ollama、Anthropic API 和 Claude Agent SDK 跑一遍,就能拿到跨智能体的偏好数据。配置里只有 backend 那一段要改,很好搭。
早导出、勤导出。 每次会话结束就导一次,别攒到最后。崩了损失小,也能一路盯着数据质量。