快速入門
在5分鐘內安裝並執行Potato。
只需幾個步驟即可執行Potato。本指南將幫助您在5分鐘內開始標註資料。
本頁介紹如何自己編寫任務。另一種開始方式是把研究描述給程式設計智慧體,讓 potato-skill 來設計和構建:參見使用程式設計智慧體快速入門。
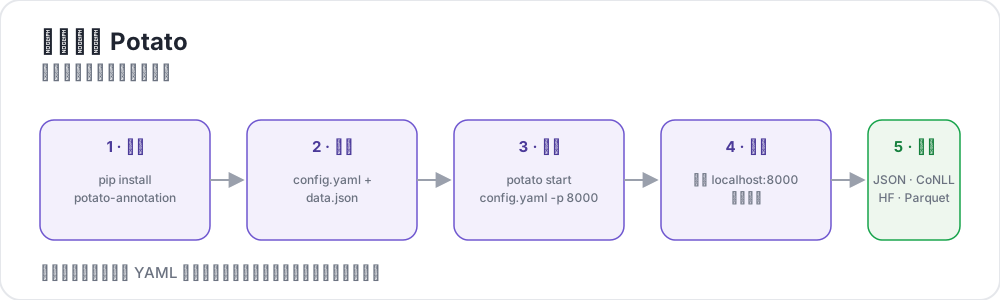 Potato in five steps
前提條件
- Python 3.7 或更高版本
- pip 包管理器
安裝
使用 pip 安裝 Potato:
bash
pip install potato-annotation建立您的第一個項目
1. 建立項目目錄
bash
mkdir my-annotation-task
cd my-annotation-task
2. 建立資料檔案
建立一個 data 資料夾,並新增一個名為 data.json 的檔案,其中包含您要標註的資料:
bash
mkdir datajson
[
  {"id": "1", "text": "I love this product! It's amazing."},
  {"id": "2", "text": "This is the worst experience ever."},
  {"id": "3", "text": "It's okay, nothing special."}
]
3. 建立配置檔案
在項目目錄中建立一個名為 config.yaml 的檔案:
重要提示:配置檔案必須位於項目目錄內。這是 Potato 2.0 的安全要求。
yaml
annotation_task_name: "Sentiment Analysis"

# Task directory (current directory)
task_dir: "."

# Data configuration
data_files:
  - "data/data.json"

item_properties:
  id_key: id
  text_key: text

# Output configuration
output_annotation_dir: "annotation_output/"
export_annotation_format: "json"

# Annotation scheme
annotation_schemes:
  - annotation_type: radio
    name: sentiment
    description: "What is the sentiment of this text?"
    labels:
      - Positive
      - Negative
      - Neutral

# Skip password authentication (anyone can log in with just a username)
require_password: false
4. 啟動伺服器
bash
python -m potato start config.yaml -p 8000或使用簡寫命令:
bash
potato start config.yaml5. 開啟瀏覽器
訪問 http://localhost:8000 即可開始標註!
項目結構
您的項目應如下所示:
text
my-annotation-task/
├── config.yaml
├── data/
│   └── data.json
└── annotation_output/     # created automatically
    └── alice/              # one subfolder per username
        └── user_state.json
下一步
- 瞭解配置基礎以獲取更多選項
- 讓程式設計智慧體藉助 potato-skill 設計並構建您的下一個任務
- 探索不同的標註類型
- 為您的團隊設定使用者管理
- 瞭解 v2 的新功能,包括 AI 支援和主動學習
工具與實用程式
當您熟悉基礎知識後,請檢視以下實用工具: