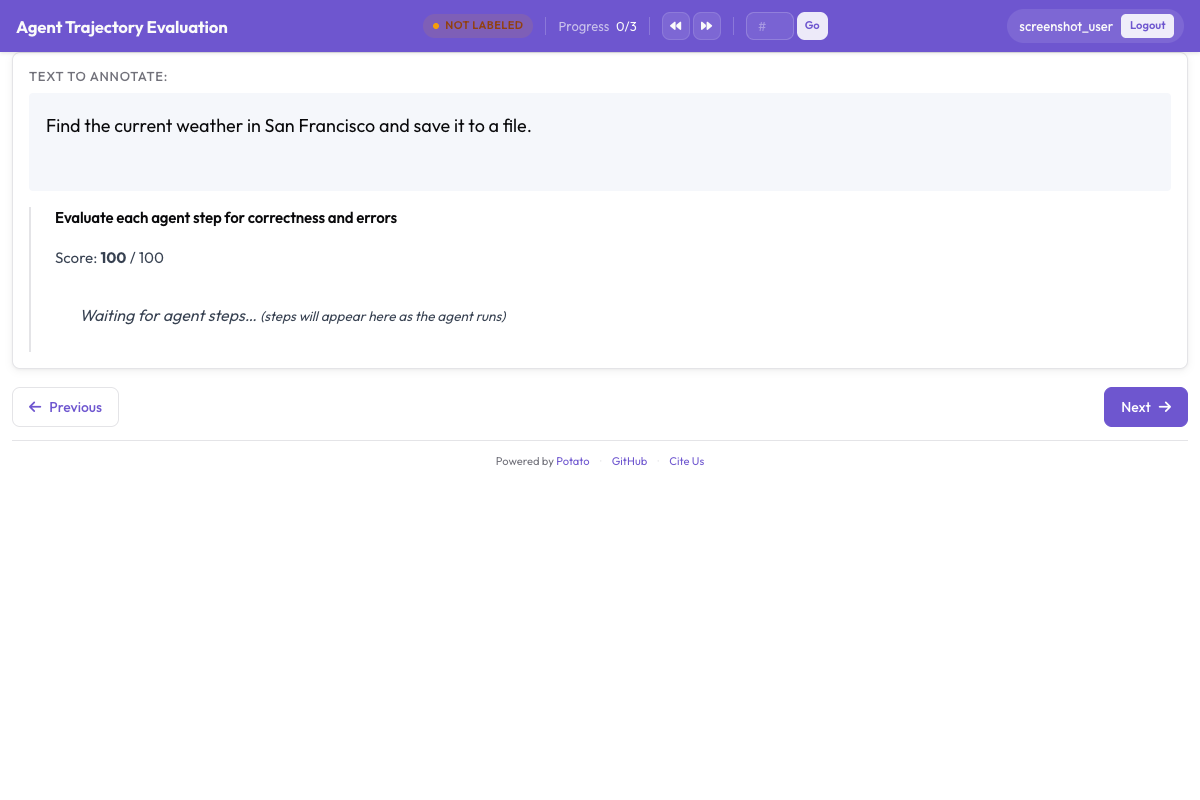
웹 브라우징 에이전트 어노테이션: WebArena 트레이스에서 인간 평가까지
Potato의 웹 에이전트 트레이스 표시 기능으로 자율 웹 브라우징 에이전트를 평가하는 방법을, 단계별 스크린샷, SVG 오버레이, 단계별 어노테이션 스키마와 함께 알아봅니다.
웹 브라우징 에이전트는 텍스트 기반 에이전트와 다른 양식에서 작동합니다. 실제 페이지를 탐색하고, 버튼을 클릭하고, 폼을 채우고, 스크롤합니다. 이런 에이전트를 평가하려면 에이전트가 무엇을 보았는지(페이지 상태)와 무엇을 했는지(행동)를 봐야 하며, 클릭한 지점을 정확히 표시하는 오버레이가 있으면 이상적입니다.
Potato의 웹 에이전트 트레이스 표시 기능은 바로 이를 위해 만들어졌습니다. 전체 페이지 스크린샷을 SVG 행동 오버레이와 함께 렌더링하고, 빠른 탐색을 위한 필름스트립을 제공하며, 각 단계의 정확성을 평가할 수 있게 해 줍니다. 전체 구성 레퍼런스는 원본 문서를 참고하세요.
이 가이드는 WebArena 트레이스를 평가하는 방법을 다루지만, 같은 접근 방식이 VisualWebArena, 원시 브라우저 녹화, 그 밖의 웹 에이전트 형식에도 적용됩니다.
사전 준비
pip install potato-annotationWebArena 트레이스 파일이 필요한데, 보통 스크린샷과 JSON 행동 로그로 함께 제공됩니다. VisualWebArena는 비슷한 형식을 사용하며, 때로는 추가적인 시각적 그라운딩 정보가 포함됩니다.
1단계: WebArena 트레이스 형식 이해하기
WebArena 트레이스는 에피소드당 하나의 JSON 파일로, 작업 설명, 행동 시퀀스, 스크린샷 경로를 담고 있습니다. 다음은 간략하게 줄인 예시입니다.
data/web_traces.jsonl을 만듭니다:
{
  "trace_id": "wa_001",
  "task": "Find the cheapest laptop on the electronics store and add it to the cart",
  "website": "shopping",
  "steps": [
    {
      "step": 0,
      "url": "http://shop.example.com/",
      "action_type": "click",
      "action_target": "Electronics category link",
      "element_id": "nav-electronics",
      "coordinates": [245, 82],
      "screenshot": "screenshots/wa_001_step_00.png",
      "dom_snapshot": "dom/wa_001_step_00.html"
    },
    {
      "step": 1,
      "url": "http://shop.example.com/electronics",
      "action_type": "click",
      "action_target": "Laptops subcategory",
      "element_id": "cat-laptops",
      "coordinates": [180, 310],
      "screenshot": "screenshots/wa_001_step_01.png"
    },
    {
      "step": 2,
      "url": "http://shop.example.com/electronics/laptops",
      "action_type": "click",
      "action_target": "Sort by: Price Low to High",
      "element_id": "sort-price-asc",
      "coordinates": [720, 155],
      "screenshot": "screenshots/wa_001_step_02.png"
    },
    {
      "step": 3,
      "url": "http://shop.example.com/electronics/laptops?sort=price_asc",
      "action_type": "click",
      "action_target": "First laptop: 'Budget Pro 14' - $349",
      "element_id": "product-101",
      "coordinates": [400, 380],
      "screenshot": "screenshots/wa_001_step_03.png"
    },
    {
      "step": 4,
      "url": "http://shop.example.com/product/101",
      "action_type": "click",
      "action_target": "Add to Cart button",
      "element_id": "add-to-cart-btn",
      "coordinates": [650, 520],
      "screenshot": "screenshots/wa_001_step_04.png"
    }
  ],
  "success": true,
  "final_screenshot": "screenshots/wa_001_final.png"
}
각 단계는 스크린샷, 수행한 행동, 대상 요소, 클릭 좌표를 담고 있습니다. Potato는 이로부터 시각적 오버레이를 그립니다.
2단계: 프로젝트 구성하기
config.yaml을 만듭니다:
annotation_task_name: "WebArena Agent Evaluation"
task_dir: "."

data_files:
  - "data/web_traces.jsonl"

item_properties:
  id_key: trace_id
  text_key: task

# --- Agentic annotation with web display ---
agentic:
  enabled: true
  trace_converter: webarena
  display_type: web_agent

  web_agent_display:
    # Screenshot rendering
    screenshot_max_width: 900
    screenshot_quality: 85

    # SVG overlays
    overlay:
      enabled: true
      click_marker: "circle"
      click_color: "#ef4444"
      click_radius: 20
      type_highlight: "#3b82f6"
      scroll_indicator: true

    # Filmstrip navigation
    filmstrip:
      enabled: true
      thumbnail_width: 150
      show_action_labels: true

    # Additional display options
    show_url_bar: true
    show_action_description: true
    show_dom_snapshot: false

# --- Annotation Schemas ---
annotation_schemes:
  # Overall task evaluation
  - annotation_type: radio
    name: task_success
    description: "Did the agent complete the task successfully?"
    labels:
      - "Success"
      - "Partial Success"
      - "Failure"
    label_requirement:
      required: true

  - annotation_type: radio
    name: task_efficiency
    description: "Was the agent's navigation path efficient?"
    labels:
      - "Optimal path"
      - "Reasonable but not optimal"
      - "Inefficient (unnecessary steps)"
      - "Completely wrong direction"
    label_requirement:
      required: true

  # Per-step evaluation
  - annotation_type: per_turn_rating
    name: action_correctness
    target: agentic_steps
    description: "Was this action correct?"
    rating_type: radio
    labels:
      - "Correct"
      - "Acceptable (not optimal but progresses toward goal)"
      - "Incorrect"
      - "Unnecessary"

  - annotation_type: per_turn_rating
    name: action_error_type
    target: agentic_steps
    description: "What went wrong?"
    rating_type: multiselect
    labels:
      - "Wrong element clicked"
      - "Wrong page navigated to"
      - "Missed a closer/better option"
      - "Incorrect form input"
      - "Premature task completion"
      - "Unnecessary navigation"
      - "Failed to scroll to target"
      - "Interaction with wrong page section"
      - "Other"
    conditional:
      show_when:
        action_correctness: ["Incorrect", "Unnecessary"]

  - annotation_type: per_turn_rating
    name: action_notes
    target: agentic_steps
    description: "Notes on this step"
    rating_type: text
    label_requirement:
      required: false

output_annotation_dir: "output/"
export_annotation_format: "jsonl"

parquet_export:
  enabled: true
  output_dir: "output/parquet/"
3단계: 웹 에이전트 표시 이해하기
웹 에이전트 트레이스 뷰어는 클릭 대상과 탐색 경로를 보여 주는 SVG 오버레이와 함께 스크린샷을 렌더링합니다:
메인 스크린샷 뷰
현재 단계의 스크린샷이 전체 너비(최대 900px)로 표시되며, 그 위에 SVG 오버레이가 얹힙니다:
- 빨간 원이 클릭 좌표에 표시되어 에이전트가 정확히 어디를 클릭했는지 보여 줍니다
- 파란 강조가 에이전트가 입력한 텍스트 입력 필드 주위에 표시됩니다
- 화살표 표시기가 스크롤 행동의 방향과 크기를 보여 줍니다
스크린샷 아래에는 다음이 표시됩니다:
- URL 표시줄: 이 단계에서의 페이지 URL을 보여 줍니다
- 행동 설명 (예: "Click on 'Electronics category link' at coordinates [245, 82]")
필름스트립
하단의 가로 필름스트립에는 모든 스크린샷의 썸네일이 표시되며, 각각 행동 유형(클릭, 입력, 스크롤)을 나타내는 작은 라벨이 붙습니다. 아무 썸네일이나 클릭하면 그 단계로 이동합니다.
필름스트립은 긴 트레이스(10단계 이상)에서 진가를 발휘하는데, 이때는 메인 뷰를 스크롤하는 것이 번거로워집니다.
단계별 어노테이션
단계별 어노테이션 컨트롤은 각 스크린샷 옆에 자리합니다. 행동을 평가하고, 잘못되었다면 오류 유형을 고르세요.
4단계: 어노테이션 워크플로
웹 에이전트 트레이스를 한 번 훑는 일반적인 과정:
-
작업 설명을 읽으세요. 에이전트가 무엇을 해내야 했는지 이해합니다.
-
필름스트립으로 개요를 파악하세요. 개별 단계를 평가하기 전에 모든 스크린샷을 빠르게 훑어 에이전트의 궤적을 감 잡습니다.
-
각 단계를 따라가세요:
- 스크린샷을 보고 페이지 상태를 이해합니다
- SVG 오버레이를 확인하여 에이전트가 무엇을 클릭했는지 봅니다
- 행동 설명을 읽습니다
- 행동을 정확(Correct), 허용(Acceptable), 부정확(Incorrect), 불필요(Unnecessary)로 평가합니다
- 부정확하다면 오류 유형을 선택합니다
-
트레이스 전체를 평가하세요. 모든 단계를 검토한 뒤 작업 성공과 효율성을 평가합니다.
-
제출하고 다음 트레이스로 넘어갑니다.
무엇을 살펴봐야 하는가
정확한 행동은 에이전트를 합리적인 방식으로 목표를 향해 움직입니다. 올바른 요소를 클릭했거나, 올바른 페이지에 도달했거나, 올바른 정보를 입력했습니다.
허용 가능한 행동은 최선은 아니지만 여전히 진전을 이룹니다. 예를 들어 에이전트가 검색창을 쓰는 대신 카테고리 페이지로 이동하는 경우입니다. 느리지만 작동합니다.
부정확한 행동은 실수입니다. 잘못된 요소, 무관한 페이지, 또는 폼에 잘못된 텍스트입니다.
불필요한 행동은 목표를 앞으로 나아가게 하지 않습니다. 무언가를 클릭하고 즉시 되돌아가거나, 대상을 지나쳐 스크롤하거나, 중요하지 않은 페이지를 헤매는 것입니다.
5단계: 오류 분류 체계
Potato는 웹 에이전트 행동을 위한 오류 분류 체계를 함께 제공합니다. 각 범주를 적용하는 방법은 다음과 같습니다:
| 오류 유형 | 설명 | 예시 |
|---|---|---|
| 잘못된 요소 클릭 | 에이전트가 잘못된 UI 요소를 클릭함 | "Laptops" 대신 "Tablets"를 클릭함 |
| 잘못된 페이지로 이동 | 에이전트가 무관한 페이지에 도달함 | 제품 목록 대신 "About Us"로 이동함 |
| 더 가까운/더 나은 옵션 놓침 | 더 나은 행동이 가능했음 | 검색창 대신 카테고리 탐색을 사용함 |
| 잘못된 폼 입력 | 에이전트가 폼에 잘못된 텍스트를 입력함 | "laptop" 대신 "labtop"으로 검색함 |
| 작업 조기 완료 | 에이전트가 너무 일찍 성공을 선언함 | 잘못된 항목을 장바구니에 담고 멈춤 |
| 불필요한 이동 | 단계가 목표에 기여하지 않음 | 카테고리 페이지 사이에서 홈페이지를 방문함 |
| 대상까지 스크롤 실패 | 대상이 뷰포트 아래에 있었음 | 요소가 보이지 않았고, 에이전트가 스크롤했어야 함 |
| 잘못된 페이지 영역과 상호작용 | 올바른 페이지지만 잘못된 영역 | 메인 콘텐츠 대신 헤더를 클릭함 |
6단계: 복잡한 트레이스 다루기
긴 트레이스 (15단계 이상)
긴 트레이스에서는 필름스트립을 사용해 의심스러운 단계를 먼저 찾으세요. 다음을 살펴보세요:
- URL이 예기치 않게 바뀌는 단계 (잘못된 이동)
- 에이전트가 뒤로 가는 것처럼 보이는 단계
- 거의 동일한 스크린샷이 반복됨 (에이전트가 루프에 갇힘)
그런 다음 그 단계들에 상세한 어노테이션 노력을 쏟으세요.
실패한 트레이스
에이전트가 실패하면 첫 번째로 부정확한 단계를 찾으세요. 그것이 에이전트를 개선하는 데 가장 유용한 어노테이션입니다. 명확하게 표시하고 에이전트가 대신 무엇을 했어야 하는지 적으세요.
모호한 행동
어떤 행동은 스크린샷만으로 판단하기 어렵습니다. DOM 스냅샷이 있다면 켜세요:
web_agent_display:
  show_dom_snapshot: true
이렇게 하면 원시 HTML이 담긴 접이식 패널이 추가되는데, 스크린샷이 모호할 때, 예를 들어 에이전트가 여러 요소가 겹친 지점을 클릭했을 때 도움이 됩니다.
7단계: VisualWebArena를 위한 구성
VisualWebArena 트레이스는 추가적인 시각적 그라운딩 정보를 담고 있습니다. 구성은 비슷하지만 시각적 그라운딩 오버레이를 사용합니다:
agentic:
  enabled: true
  trace_converter: webarena         # same converter handles both
  display_type: web_agent

  web_agent_display:
    screenshot_max_width: 1000
    overlay:
      enabled: true
      click_marker: "crosshair"     # crosshair is better for precise grounding
      click_color: "#ef4444"
      click_radius: 15
      bounding_box: true            # show element bounding box if available
      bounding_box_color: "#f59e0b"
    filmstrip:
      enabled: true
      thumbnail_width: 180
8단계: 결과 분석하기
단계 위치별 행동 정확성
웹 에이전트 오류는 트레이스의 특정 지점에 몰리는 경향이 있습니다. 어디에서 발생하는지 확인하세요:
import pandas as pd
import json

annotations = []
with open("output/annotations.jsonl") as f:
    for line in f:
        annotations.append(json.loads(line))

# Collect per-step correctness by position
step_errors = {}
for ann in annotations:
    correctness = ann["annotations"].get("action_correctness", {})
    for step_idx, label in correctness.items():
        pos = int(step_idx)
        if pos not in step_errors:
            step_errors[pos] = {"Correct": 0, "Acceptable": 0, "Incorrect": 0, "Unnecessary": 0}
        step_errors[pos][label] += 1

# Print error rate by step position
print("Error rate by step position:")
for pos in sorted(step_errors.keys()):
    counts = step_errors[pos]
    total = sum(counts.values())
    error_rate = (counts["Incorrect"] + counts["Unnecessary"]) / total
    print(f"  Step {pos}: {error_rate:.1%} error rate ({total} observations)")
오류 유형 분포
error_counts = {}
for ann in annotations:
    errors = ann["annotations"].get("action_error_type", {})
    for step_idx, error_list in errors.items():
        for error in error_list:
            error_counts[error] = error_counts.get(error, 0) + 1

print("\nError Type Distribution:")
for error, count in sorted(error_counts.items(), key=lambda x: -x[1]):
    print(f"  {error}: {count}")
웹사이트별 성공률
# If traces span multiple websites
website_success = {}
for ann in annotations:
    # Assuming website info is in the original trace data
    success = ann["annotations"]["task_success"]
    website = ann.get("metadata", {}).get("website", "unknown")
    if website not in website_success:
        website_success[website] = {"Success": 0, "Partial Success": 0, "Failure": 0}
    website_success[website][success] += 1

for website, counts in website_success.items():
    total = sum(counts.values())
    rate = counts["Success"] / total
    print(f"{website}: {rate:.1%} success rate")
9단계: 평가 규모 확장하기
여러 어노테이터와 일치도 계산
연구 논문을 위해서는 각 트레이스에 여러 어노테이터를 배정하세요:
annotation_task_config:
  total_annotations_per_instance: 3
  assignment_strategy: random
작업 성공 라벨에 대한 어노테이터 간 일치도를 계산하세요:
from sklearn.metrics import cohen_kappa_score
import pandas as pd

df = pd.read_parquet("output/parquet/annotations.parquet")
success = df[df["schema_name"] == "task_success"]
pivot = success.pivot(index="instance_id", columns="annotator", values="value")

# Pairwise kappa
annotators = pivot.columns.tolist()
for i in range(len(annotators)):
    for j in range(i + 1, len(annotators)):
        mask = pivot[[annotators[i], annotators[j]]].dropna()
        kappa = cohen_kappa_score(mask[annotators[i]], mask[annotators[j]])
        print(f"Kappa ({annotators[i]} vs {annotators[j]}): {kappa:.3f}")
Solo Mode와 결합하기
대규모 평가(500개 이상의 트레이스)에서는 Solo Mode를 사용해 LLM이 쉬운 트레이스를 처리하게 하세요:
solo_mode:
  enabled: true
  llm:
    endpoint_type: openai
    model: "gpt-4o"
    api_key: ${OPENAI_API_KEY}
  accuracy_threshold: 0.90

agentic:
  enabled: true
  trace_converter: webarena
  display_type: web_agent
사람은 어려운 트레이스를 평가하고, LLM은 명확한 성공과 분명한 실패를 처리합니다.
요약
웹 브라우징 에이전트를 평가하려면 에이전트가 정확히 무엇을 보고 무엇을 했는지 봐야 합니다. Potato의 웹 에이전트 표시는 클릭 대상, 입력 필드, 스크롤 행동을 표시하는 오버레이와 함께 전체 스크린샷을 제공하고, 빠른 개요와 단계 간 이동을 위한 필름스트립을 제공하며, 탐색 경로를 추적하는 URL 표시줄과 웹에 특화된 오류 분류 체계를 갖춘 단계별 어노테이션, 그리고 WebArena, VisualWebArena, 원시 브라우저 녹화에 걸친 동일한 설정을 제공합니다.
오버레이가 모든 것을 작동하게 하는 핵심입니다. 에이전트가 실제로 어디를 클릭했는지 보지 못하면 그 행동이 옳았는지 안정적으로 판단할 수 없습니다.
더 읽어보기
- 에이전틱 어노테이션 문서 -- 전체 구성 레퍼런스
- AI 에이전트 평가하기 -- 일반적인 에이전트 평가 가이드
- Solo Mode -- 인간-LLM 협업으로 평가 확장하기
- Parquet 내보내기 -- 분석을 위해 결과 내보내기