Eine Aufgabe zur Sentimentanalyse aufsetzen
So baust du eine vollständige Aufgabe zur Sentimentklassifikation mit Radiobuttons, Tooltips und Tastenkürzeln für zügiges Labeln.
Sentimentanalyse gehört zu den häufigsten NLP-Aufgaben, und saubere Labels dafür lassen sich in Potato ohne Umwege einsammeln. Dieses Tutorial baut eine Oberfläche zur Sentiment-Annotation, die du Annotierenden tatsächlich vorlegen kannst, samt der Tastenkürzel und Qualitätsprüfungen, die das Labeln beschleunigen.
Überblick über das Projekt
Wir annotieren Beiträge aus sozialen Medien. Die Oberfläche umfasst:
- dreistufige Sentimentklassifikation (Positive, Negative, Neutral)
- eine Sicherheitsbewertung zu jeder Annotation
- optionale Begründungen als Freitext
- Tastenkürzel für mehr Tempo
- Maßnahmen zur Qualitätskontrolle
Vollständige Konfiguration
Hier die komplette config.yaml:
annotation_task_name: "Social Media Sentiment Analysis"

# Data configuration
data_files:
  - "data/tweets.json"

item_properties:
  id_key: id
  text_key: text

# Annotation interface
annotation_schemes:
  # Primary sentiment label
  - annotation_type: radio
    name: sentiment
    description: "What is the overall sentiment of this post?"
    labels:
      - name: Positive
        tooltip: "Expresses happiness, satisfaction, or approval"
        keyboard_shortcut: "1"
      - name: Negative
        tooltip: "Expresses sadness, frustration, or disapproval"
        keyboard_shortcut: "2"
      - name: Neutral
        tooltip: "Factual, objective, or lacks emotional content"
        keyboard_shortcut: "3"
    label_requirement:
      required: true

  # Confidence rating
  - annotation_type: likert
    name: confidence
    description: "How confident are you in your sentiment label?"
    size: 5
    min_label: "Not confident"
    max_label: "Very confident"
    label_requirement:
      required: true

  # Optional explanation
  - annotation_type: text
    name: explanation
    description: "Why did you choose this label? (Optional)"
    rows: 4
    label_requirement:
      required: false
    placeholder: "Explain your reasoning..."

# Guidelines
annotation_guidelines:
  title: "Sentiment Annotation Guidelines"
  content: |
    ## Your Task
    Classify the sentiment expressed in each social media post.

    ## Labels

    **Positive**: The author expresses positive emotions or opinions
    - Happiness, excitement, gratitude
    - Praise, recommendations, approval
    - Examples: "Love this!", "Best day ever!", "Highly recommend"

    **Negative**: The author expresses negative emotions or opinions
    - Anger, frustration, sadness
    - Complaints, criticism, disapproval
    - Examples: "Terrible service", "So disappointed", "Worst experience"

    **Neutral**: Factual or lacking clear sentiment
    - News, announcements, questions
    - Mixed or balanced opinions
    - Examples: "The store opens at 9am", "Has anyone tried this?"

    ## Tips
    - Focus on the author's sentiment, not the topic
    - Sarcasm should be labeled based on intended meaning
    - When unsure, lower your confidence rating

# User management
automatic_assignment:
  on: true
  sampling_strategy: random
  labels_per_instance: 1
  instance_per_annotator: 100
Format der Beispieldaten
Lege data/tweets.json an:
{"id": "t001", "text": "Just got my new laptop and I'm absolutely loving it! Best purchase of the year! #happy"}
{"id": "t002", "text": "Waited 2 hours for customer service and they still couldn't help me. Never shopping here again."}
{"id": "t003", "text": "The new coffee shop on Main Street opens tomorrow at 7am."}
{"id": "t004", "text": "This movie was okay I guess. Some good parts, some boring parts."}
{"id": "t005", "text": "Can't believe how beautiful the sunset was tonight! Nature is amazing."}
Die Aufgabe starten
Starte den Annotationsserver:
potato start config.yamlÖffne http://localhost:8000 und melde dich an, um mit dem Annotieren zu beginnen.
Das sehen deine Annotierenden, sobald der Server läuft:
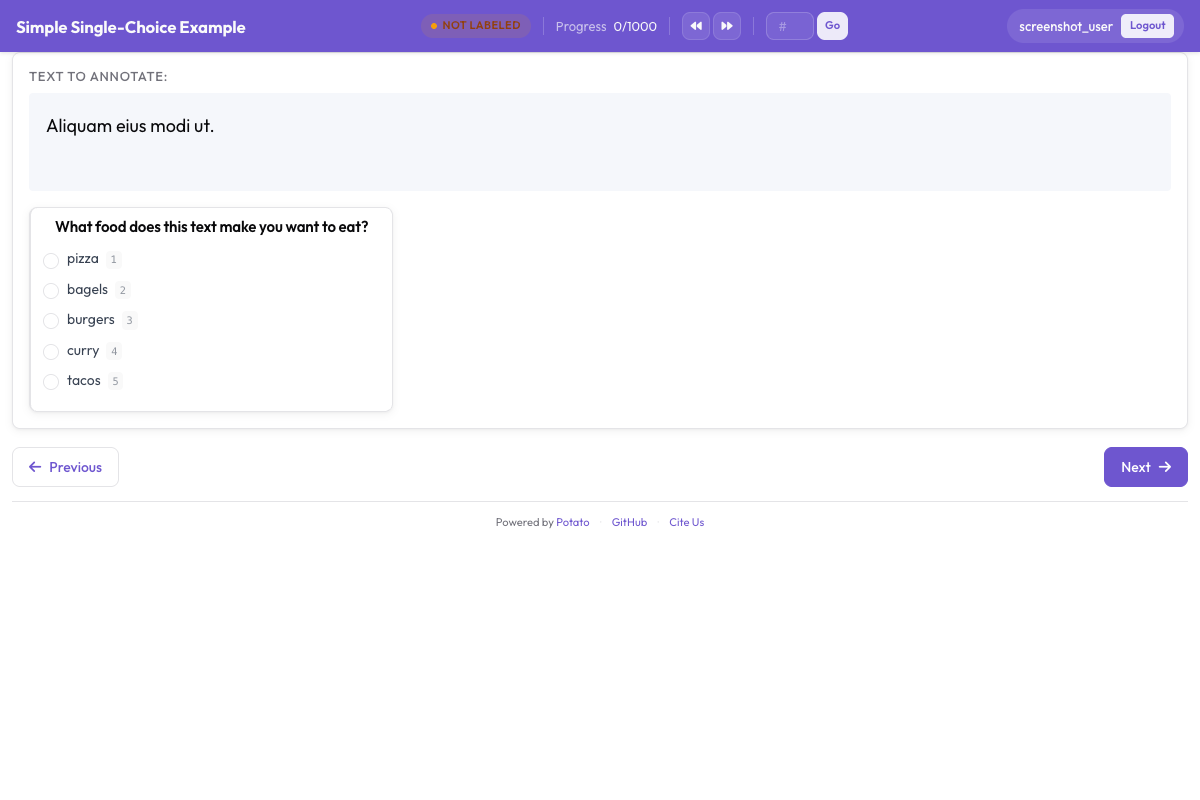 Die Oberfläche zur Sentimentklassifikation mit Radiobutton-Labels, Sicherheitsskala und optionalem Begründungsfeld
Die Oberfläche verstehen
Der Annotationsbereich
Die Oberfläche zeigt:
- den zu annotierenden Text (mit hervorgehobenen URLs, Erwähnungen und Hashtags)
- Radiobuttons für das Sentiment, mit Tooltips
- die Likert-Skala für die Sicherheit
- das optionale Textfeld für die Begründung
Ablauf über die Tastatur
Wenn die Annotierenden erst einmal im Takt sind, geht es so am schnellsten:
- Text lesen
1,2oder3für das Sentiment drücken- Sicherheitsstufe anklicken (oder mit der Maus wählen)
Enterzum Absenden drücken
Fortschrittsanzeige
Die Oberfläche zeigt:
- den aktuellen Fortschritt (etwa «15 / 100»)
- die geschätzte Restzeit
- Statistiken zur Sitzung
Ausgabeformat
Annotationen landen in annotations/username.jsonl:
{
  "id": "t001",
  "text": "Just got my new laptop and I'm absolutely loving it!...",
  "annotations": {
    "sentiment": "Positive",
    "confidence": 5,
    "explanation": "Clear expression of happiness with the purchase"
  },
  "annotator": "john_doe",
  "timestamp": "2026-01-15T14:30:00Z"
}
Qualitätskontrolle ergänzen
Aufmerksamkeitstests
Misch Goldstandards unter die Daten, um zu prüfen, ob die Annotierenden bei der Sache sind. Alle Optionen der hier verwendeten Schemata radio und likert stehen in der Quelldokumentation.
quality_control:
  attention_checks:
    enabled: true
    frequency: 10  # Every 10th item
    items:
      - text: "I am extremely happy and satisfied! This is the best!"
        expected:
          sentiment: "Positive"
      - text: "This is absolutely terrible and I hate it completely."
        expected:
          sentiment: "Negative"
Inter-Annotator-Übereinstimmung
Für Forschungsprojekte lässt du mehrere Annotationen einsammeln:
automatic_assignment:
  on: true
  sampling_strategy: random
  labels_per_instance: 3  # Each item annotated by 3 people
  instance_per_annotator: 50
Ergebnisse auswerten
Annotationen exportieren und auswerten:
import json
from collections import Counter

# Load annotations
annotations = []
with open('annotations/annotator1.jsonl') as f:
    for line in f:
        annotations.append(json.loads(line))

# Sentiment distribution
sentiments = Counter(a['annotations']['sentiment'] for a in annotations)
print(f"Sentiment distribution: {dict(sentiments)}")

# Average confidence
confidences = [a['annotations']['confidence'] for a in annotations]
print(f"Average confidence: {sum(confidences)/len(confidences):.2f}")
Nächste Schritte
- Richte Crowdsourcing für Annotation in großem Umfang ein
- Ergänze KI-Vorschläge, damit das Labeln schneller geht
- Setz aktives Lernen ein, um schwierige Fälle vorzuziehen
Mehr Annotationstypen findest du in unserer Dokumentation.