बेहतर कोडिंग एजेंट प्रशिक्षित करने के लिए प्रोसेस रिवॉर्ड डेटा कैसे जुटाएँ
Potato से PRM प्रशिक्षण के लिए प्रति-चरण रिवॉर्ड संकेत जुटाने की चरण-दर-चरण गाइड। इसमें first-error मोड, प्रति-चरण एनोटेशन और प्रशिक्षण पाइपलाइन में निर्यात शामिल है।
प्रोसेस रिवॉर्ड मॉडल क्या हैं?
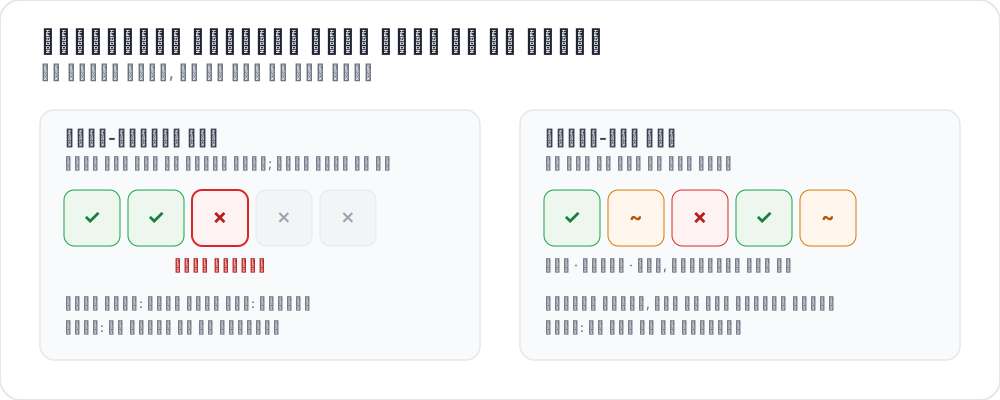 प्रोसेस रिवॉर्ड लेबल करने के दो तरीक़े
आउटकम रिवॉर्ड मॉडल (ORM) कोडिंग एजेंट की ट्रैजेक्टरी के सिर्फ़ आख़िर को देखते हैं: कोड कंपाइल हुआ या नहीं, टेस्ट पास हुए या नहीं, समस्या हल हुई या नहीं। प्रोसेस रिवॉर्ड मॉडल (PRM) इसकी जगह हर बीच के चरण को स्कोर करते हैं। हर चरण पर रिवॉर्ड संकेत मिलने से प्रशिक्षण विधियाँ यह पकड़ पाती हैं कि एजेंट कहाँ भटका, जिससे सीखना आम तौर पर ज़्यादा सैंपल-कुशल होता है और सामान्यीकरण में मदद मिलती है।
हाल का काम इसी दिशा में गया है। AgentPRM एजेंट कामों के लिए प्रोसेस रिवॉर्ड को नए सिरे से गढ़ता है: हर क्रिया को इस आधार पर अंक मिलते हैं कि वह लक्ष्य की ओर कितनी प्रगति कराती है, न कि वह सही है या नहीं; और यह जिन बेसलाइनों से तुलना करता है उनसे 8× से ज़्यादा बेहतर कंप्यूट दक्षता बताता है। ToolRM ने पाया कि प्राकृतिक भाषा के आउटपुट पर प्रशिक्षित रिवॉर्ड मॉडल tool call को ठीक से नहीं आँक पाते, इसलिए उसने tool-विशिष्ट रिवॉर्ड मॉडल और उन्हें परखने के लिए FC-RewardBench बनाया। इसके उलट, DeepSWE एक कोडिंग एजेंट को सिर्फ़ एक विरल परिणाम-रिवॉर्ड पर प्रशिक्षित करता है, यानी टेस्ट पास हुए या नहीं, और SWE-bench Verified पर 42.2% Pass@1 तथा टेस्ट-टाइम स्केलिंग के साथ 59% तक पहुँचता है। यही वह केवल-परिणाम वाला ढाँचा है जिसे प्रोसेस सुपरविज़न सुधारना चाहता है।
इन सबको जिस चीज़ की ज़रूरत है वह है अच्छा चरण-स्तरीय मानवीय एनोटेशन, और अड़चन आम तौर पर वहीं होती है। Potato की प्रोसेस रिवॉर्ड योजनाएँ यही डेटा तेज़ी से जुटाने के लिए बनी हैं। अंतर्निहित योजना के लिए ट्रैजेक्टरी मूल्यांकन दस्तावेज़ देखें, और ट्रेस इनपुट के विवरण के लिए एजेंट ट्रेस दस्तावेज़।
दो एनोटेशन मोड
Potato में दो PRM एनोटेशन मोड हैं जो रफ़्तार और बारीकी के बीच सौदा करते हैं। अपने डेटा बजट और लक्ष्यों के हिसाब से चुनें।
First-Error मोड
first-error मोड में एनोटेटर ट्रैजेक्टरी को ऊपर से नीचे पढ़ता है और उस पहले चरण पर क्लिक करता है जहाँ एजेंट ग़लती करता है। इसके बाद Potato उससे पहले के हर चरण को सही और उस चरण से आगे के हर चरण को ग़लत चिह्नित कर देता है।
यह तेज़ इसलिए है क्योंकि एनोटेटर को बस एक निर्णय-बिंदु ढूँढना होता है। यह तब अच्छा काम करता है जब एरर आगे तक फैलते हों, यानी एजेंट एक बार पटरी से उतरने के बाद शायद ही संभल पाता हो, और व्यवहार में यही आम स्थिति है।
annotation_schemes:
  - annotation_type: process_reward
    name: prm_first_error
    mode: "first_error"
    description: >
      Review the agent's steps from top to bottom. Click on the
      first step where the agent makes a mistake. All steps before
      your selection will be marked correct; all steps after
      (including the selected step) will be marked incorrect.
first-error एनोटेशन का कार्यप्रवाह ऐसा दिखता है:
- एनोटेटर एक ट्रेस खोलता है और CodingTraceDisplay कंपोनेंट से रेंडर किए गए सारे चरण देखता है।
- वह चरणों को क्रम से पढ़ता है और diff, टर्मिनल आउटपुट तथा तर्क जाँचता है।
- जब उसे पहला ग़लत चरण मिलता है, वह उसके बग़ल में एरर मार्कर पर क्लिक करता है।
- चरण 0 से N-1 तक हरे (सही) हो जाते हैं, चरण N से आख़िर तक लाल (ग़लत) हो जाते हैं।
- एनोटेटर अपने आप हुई लेबलिंग देखता है और पुष्टि के लिए "Submit" पर क्लिक करता है।
अगर पूरा ट्रेस सही है (एजेंट ने टास्क बिल्कुल ठीक हल किया), तो एनोटेटर "All Correct" पर क्लिक करता है। अगर पहला ही चरण ग़लत है, तो वह चरण 0 पर क्लिक करता है या "All Incorrect" इस्तेमाल करता है।
PRM एनोटेशन इंटरफ़ेस काम करते हुए ऐसा दिखता है:
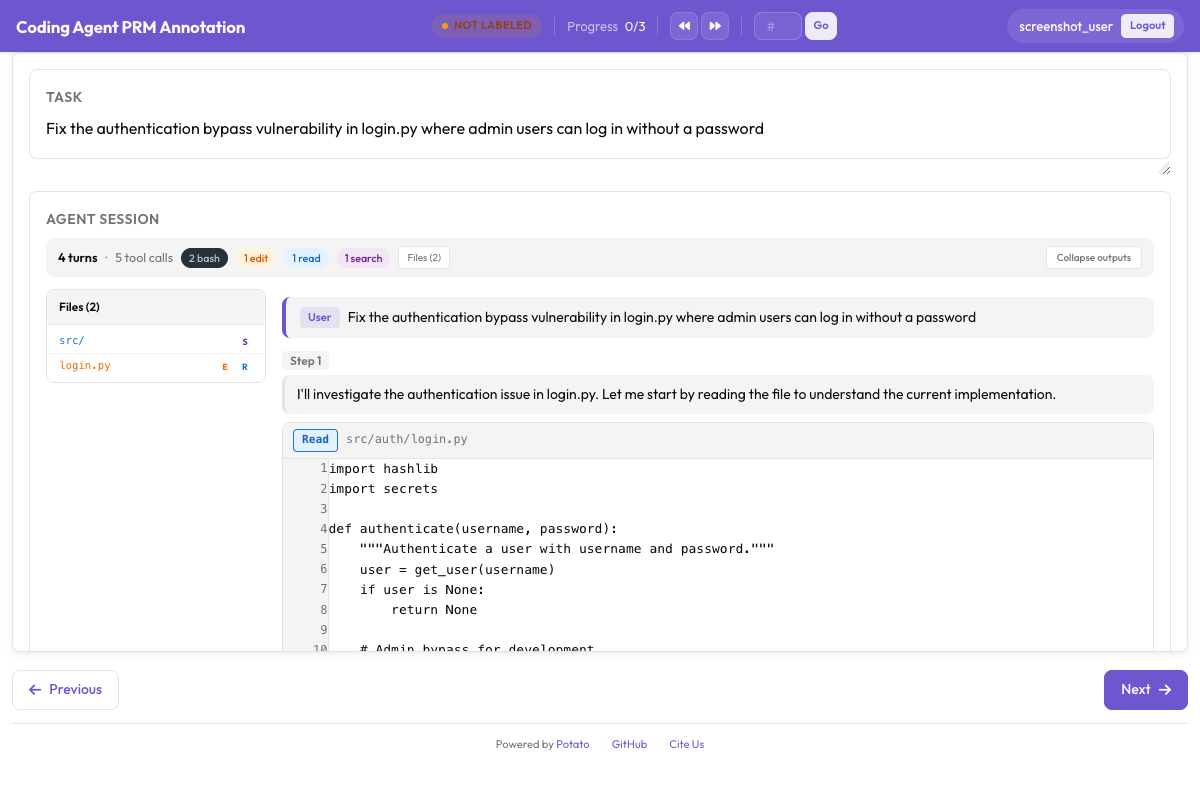 first-error मोड में पहले ग़लत चरण पर क्लिक करें और उसके बाद के सारे चरण अपने आप चिह्नित हो जाते हैं
प्रति-चरण मोड
प्रति-चरण मोड में हर चरण को अपना लेबल मिलता है। इससे ज़्यादा भरा-पूरा डेटा बनता है, क्योंकि यह उन मामलों को भी पकड़ता है जहाँ एजेंट एरर से आंशिक रूप से उबर जाता है, कोई हानिरहित पर ग़ैरज़रूरी चक्कर लगाता है, या ऐसा चरण उठाता है जो अपने आप में ठीक है पर संदर्भ में ग़लत है।
annotation_schemes:
  - annotation_type: process_reward
    name: prm_per_step
    mode: "per_step"
PRM एनोटेशन प्रोजेक्ट सेट करना
चरण 1: अपना ट्रेस डेटा तैयार करें
आपका इनपुट डेटा एक JSONL फ़ाइल होनी चाहिए जिसकी हर पंक्ति एक JSON ऑब्जेक्ट हो और उसमें एजेंट की ट्रैजेक्टरी हो। मुख्य फ़ील्ड id, issue_description और structured_turns हैं:
{
  "id": "trace_001",
  "issue_description": "Fix the TypeError in parse_config() when config file is empty",
  "repo": "myorg/myproject",
  "base_commit": "a1b2c3d",
  "structured_turns": [
    {
      "step_idx": 0,
      "type": "thinking",
      "content": "I need to understand what parse_config does and where the TypeError occurs. Let me read the file first."
    },
    {
      "step_idx": 1,
      "type": "file_read",
      "path": "src/config.py",
      "content": "def parse_config(path):\n    with open(path) as f:\n        data = json.load(f)\n    return data['settings']",
      "start_line": 1,
      "end_line": 4
    },
    {
      "step_idx": 2,
      "type": "thinking",
      "content": "The bug is on line 4. When the file is empty, json.load returns None, and None['settings'] raises TypeError. I should add a check."
    },
    {
      "step_idx": 3,
      "type": "file_edit",
      "path": "src/config.py",
      "diff": "--- a/src/config.py\n+++ b/src/config.py\n@@ -1,4 +1,6 @@\n def parse_config(path):\n     with open(path) as f:\n         data = json.load(f)\n+    if data is None:\n+        return {}\n     return data['settings']"
    },
    {
      "step_idx": 4,
      "type": "bash_command",
      "command": "python -m pytest tests/test_config.py -v",
      "output": "tests/test_config.py::test_parse_config_empty PASSED\ntests/test_config.py::test_parse_config_valid PASSED\n\n2 passed in 0.12s",
      "exit_code": 0
    }
  ]
}
अगर आप किसी मौजूदा एजेंट फ़ॉर्मैट से बदल रहे हैं, तो ट्रेस कन्वर्टर टूल इस्तेमाल करें:
# Convert Claude Code traces
potato convert-traces \
  --format claude_code \
  --input ./raw_traces/ \
  --output ./data/traces.jsonl

# Convert SWE-Agent trajectories
potato convert-traces \
  --format swe_agent \
  --input ./swe_agent_output/ \
  --output ./data/traces.jsonl
Potato कोडिंग एजेंट ट्रेस को सही diff हाइलाइटिंग के साथ रेंडर करता है:
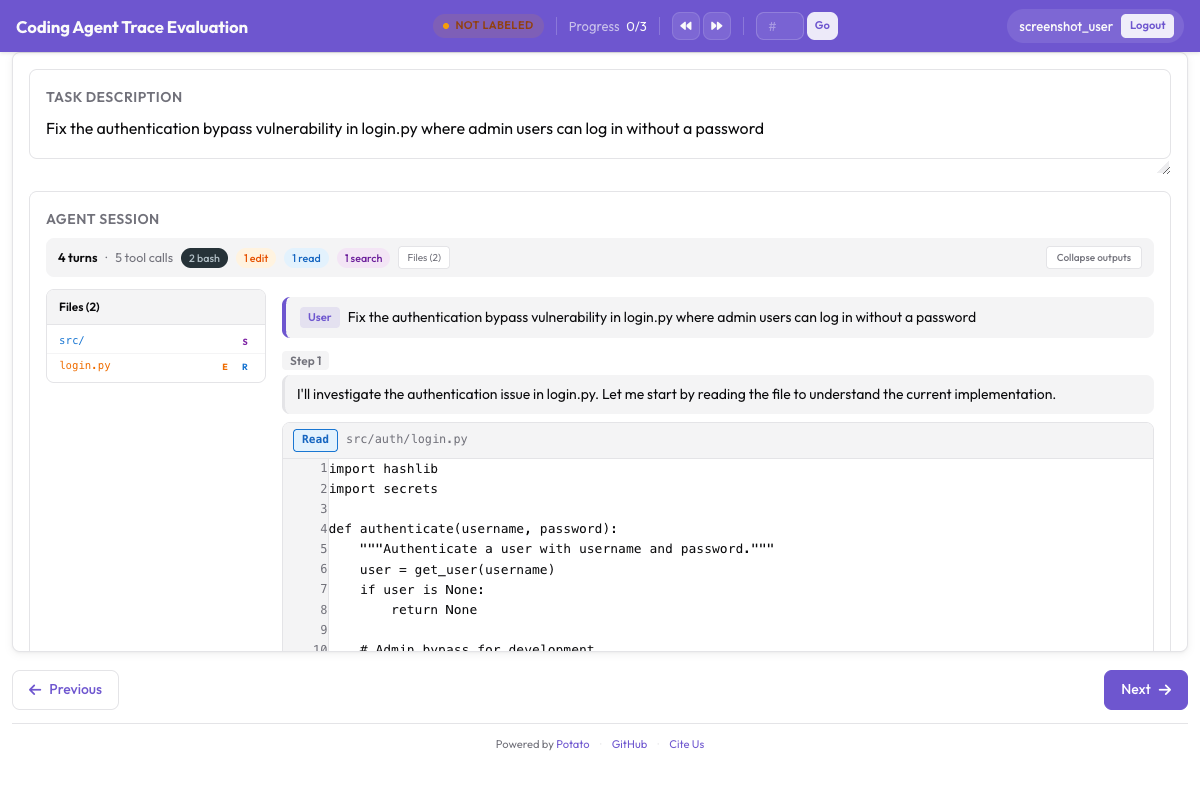 कोड diff, टर्मिनल आउटपुट और फ़ाइल रीड सिंटैक्स हाइलाइटिंग के साथ रेंडर होते हैं
चरण 2: अपना कॉन्फ़िगरेशन बनाएँ
first-error मोड से PRM एनोटेशन करने के लिए पूरा प्रोजेक्ट कॉन्फ़िगरेशन यह रहा:
# config.yaml
project_name: "PRM Data Collection - SWE-bench Traces"
port: 8000

data:
  source: "local"
  input_path: "./data/traces.jsonl"
  data_format: "coding_trace"

coding_agent:
  display:
    diff_style: "unified"
    context_lines: 3
    syntax_highlighting: true
    terminal_theme: "dark"
    file_tree:
      enabled: true
      position: "left"
    collapsible:
      auto_collapse_thinking: true
      auto_collapse_long_output: true
      long_output_threshold: 50

annotation_schemes:
  - annotation_type: process_reward
    name: step_reward
    mode: "first_error"
    description: >
      Review the agent's trajectory step by step. Click the first
      step where the agent makes an error. If the entire trajectory
      is correct, click "All Correct."

  - annotation_type: radio
    name: outcome
    labels:
      - value: "resolved"
        text: "Fully Resolved"
      - value: "partial"
        text: "Partially Resolved"
      - value: "not_resolved"
        text: "Not Resolved"

  - annotation_type: text
    name: error_description
    description: "If incorrect, briefly describe the error"
    placeholder: "e.g., Agent edited the wrong file..."

output:
  path: "./output/"
  format: "jsonl"

quality_control:
  inter_annotator_agreement: true
  overlap_percentage: 15
  minimum_time_per_instance: 20

annotators:
  - username: "reviewer1"
  - username: "reviewer2"
  - username: "reviewer3"
चरण 3: एनोटेशन सर्वर चलाएँ
# Start the annotation server
potato start config.yaml -p 8000

# Or run in the background
nohup potato start config.yaml -p 8000 > potato.log 2>&1 &
http://localhost:8000 पर जाएँ, कॉन्फ़िगर किए गए एनोटेटर खातों में से किसी एक से लॉग इन करें, और ट्रेस देखना शुरू करें।
चरण 4: प्रगति पर नज़र रखें
एनोटेशन चलते समय प्रगति और सहमति देखते रहें:
# Check annotation progress
potato status config.yaml

# View inter-annotator agreement
potato agreement config.yaml --metric krippendorff_alpha
प्रशिक्षण फ़ॉर्मैट में निर्यात
एनोटेशन पूरा होने पर डेटा को उस फ़ॉर्मैट में निर्यात करें जिसकी आपकी प्रशिक्षण पाइपलाइन को ज़रूरत है।
रिवॉर्ड मॉडल प्रशिक्षण के लिए PRM फ़ॉर्मैट
PRM निर्यात फ़ॉर्मैट हर ट्रेस के लिए एक JSON ऑब्जेक्ट बनाता है जिसमें चरण-स्तरीय लेबल होते हैं:
potato export \
  --format prm \
  --project ./output/ \
  --output ./training_data/prm_labels.jsonl
आउटपुट ऐसा दिखता है:
{
  "trace_id": "trace_001",
  "issue_description": "Fix the TypeError in parse_config() when config file is empty",
  "total_steps": 5,
  "first_error_step": null,
  "all_correct": true,
  "steps": [
    {"step_idx": 0, "type": "thinking", "label": "correct", "reward": 1.0},
    {"step_idx": 1, "type": "file_read", "label": "correct", "reward": 1.0},
    {"step_idx": 2, "type": "thinking", "label": "correct", "reward": 1.0},
    {"step_idx": 3, "type": "file_edit", "label": "correct", "reward": 1.0},
    {"step_idx": 4, "type": "bash_command", "label": "correct", "reward": 1.0}
  ]
}
DPO/RLHF प्रेफ़रेंस जोड़े
जब आपके पास एक ही समस्या के लिए कई ट्रेस हों (जैसे अलग-अलग एजेंट या अलग-अलग रन से), तो Potato PRM लेबल के आधार पर प्रेफ़रेंस जोड़े बना सकता है:
potato export \
  --format preference_pairs \
  --project ./output/ \
  --output ./training_data/preferences.jsonl \
  --pair_by "issue_id"
प्रेफ़रेंस जोड़ा निर्यात उन ट्रेस की तुलना करता है जिन्होंने एक ही टास्क पर काम किया और चरण-स्तरीय लेबल के आधार पर बेहतर वाला चुनता है:
{
  "prompt": "Fix the TypeError in parse_config() when config file is empty",
  "chosen_trace_id": "trace_001",
  "rejected_trace_id": "trace_002",
  "chosen_first_error": null,
  "rejected_first_error": 3,
  "chosen_steps": 5,
  "rejected_steps": 7,
  "margin": 0.8
}
SWE-bench के अनुकूल नतीजे
बेंचमार्किंग के लिए SWE-bench फ़ॉर्मैट में निर्यात करें:
potato export \
  --format swe_bench \
  --project ./output/ \
  --output ./training_data/swe_bench_results.json
विश्लेषण के उदाहरण
एनोटेशन जुटाने के बाद डेटा का विश्लेषण करने और पैटर्न पहचानने के लिए ये Python स्निपेट इस्तेमाल करें।
चरण प्रकार के हिसाब से चरण-स्तरीय शुद्धता
import json
from collections import defaultdict

# Load PRM annotations
with open("training_data/prm_labels.jsonl") as f:
    traces = [json.loads(line) for line in f]

# Compute accuracy by step type
type_stats = defaultdict(lambda: {"correct": 0, "total": 0})

for trace in traces:
    for step in trace["steps"]:
        step_type = step["type"]
        type_stats[step_type]["total"] += 1
        if step["label"] == "correct":
            type_stats[step_type]["correct"] += 1

print("Step-Level Accuracy by Type:")
print("-" * 45)
for step_type, stats in sorted(type_stats.items()):
    acc = stats["correct"] / stats["total"] * 100
    print(f"  {step_type:<20} {acc:5.1f}%  ({stats['correct']}/{stats['total']})")
आम विफलता-बिंदु ढूँढना
import json
from collections import Counter

with open("training_data/prm_labels.jsonl") as f:
    traces = [json.loads(line) for line in f]

# Analyze where errors first occur
error_positions = []
error_types_at_first_error = Counter()

for trace in traces:
    if trace["first_error_step"] is not None:
        pos = trace["first_error_step"]
        total = trace["total_steps"]
        # Normalize position to 0-1 range
        error_positions.append(pos / total)
        # Track what type of step caused the first error
        error_step = trace["steps"][pos]
        error_types_at_first_error[error_step["type"]] += 1

if error_positions:
    avg_pos = sum(error_positions) / len(error_positions)
    print(f"Average first-error position: {avg_pos:.2f} (0=start, 1=end)")
    print(f"Traces with errors: {len(error_positions)}/{len(traces)}")
    print()
    print("Most common step types at first error:")
    for step_type, count in error_types_at_first_error.most_common(5):
        print(f"  {step_type}: {count}")
PRM लेबल पर एनोटेटर-अंतर सहमति निकालना
import json
import numpy as np
from sklearn.metrics import cohen_kappa_score

def load_annotations(annotator_file):
    """Load annotations from a single annotator's output file."""
    with open(annotator_file) as f:
        data = {item["trace_id"]: item for item in
                (json.loads(line) for line in f)}
    return data

ann1 = load_annotations("output/reviewer1/annotations.jsonl")
ann2 = load_annotations("output/reviewer2/annotations.jsonl")

# Find overlapping traces
overlap_ids = set(ann1.keys()) & set(ann2.keys())
print(f"Overlapping traces: {len(overlap_ids)}")

# Compare first-error step labels
labels1 = []
labels2 = []
for trace_id in overlap_ids:
    fe1 = ann1[trace_id].get("first_error_step", -1)
    fe2 = ann2[trace_id].get("first_error_step", -1)
    # Bin into: all_correct, early_error (first half), late_error (second half)
    total = ann1[trace_id]["total_steps"]
    for fe, labels in [(fe1, labels1), (fe2, labels2)]:
        if fe is None or fe == -1:
            labels.append("all_correct")
        elif fe < total / 2:
            labels.append("early_error")
        else:
            labels.append("late_error")

kappa = cohen_kappa_score(labels1, labels2)
print(f"Cohen's kappa (binned first-error): {kappa:.3f}")
कुशल PRM डेटा संग्रह के लिए सुझाव
रफ़्तार के लिए first-error मोड इस्तेमाल करें। अगर आप सर्च (MCTS, best-of-N सैंपलिंग) को दिशा देने के लिए PRM प्रशिक्षित कर रहे हैं, तो first-error मोड प्रति-चरण मोड से 2-3 गुना तेज़ी से पर्याप्त संकेत दे देता है। वैसे भी ज़्यादातर एजेंट सिलसिलेवार विफल होते हैं: एक ग़लती से ख़राब चरणों की पूरी कड़ी बन जाती है।
जब बारीकी चाहिए तब प्रति-चरण मोड इस्तेमाल करें। अगर आपके लिए आंशिक सुधार, हानिरहित चक्कर मायने रखते हैं, या आप दो से ज़्यादा लेबल वाला चरण-स्तरीय रिवॉर्ड मॉडल बना रहे हैं, तो प्रति-चरण मोड अपना अतिरिक्त समय वसूल कर देता है।
PRM को जोड़ीदार तुलना के साथ मिलाएँ। ट्रेस को अलग-अलग PRM से लेबल करें, फिर एक ही समस्या पर काम करने वाले ट्रेस पर जोड़ीदार तुलना चलाएँ। एक ही एनोटेशन पास से आपको चरण-स्तरीय रिवॉर्ड और प्रेफ़रेंस जोड़े दोनों मिल जाते हैं।
अनुभवी एनोटेटरों से शुरू करें। PRM एनोटेशन का मतलब है कोड, diff और टर्मिनल आउटपुट पढ़ना। अनुभवी डेवलपरों के छोटे समूह से शुरू करें, सहमति नापें, उदाहरणों से कैलिब्रेट करें, फिर पैमाना बढ़ाएँ।
प्रति इंस्टेंस न्यूनतम समय तय करें। ट्रेस उलझे हुए होते हैं। 30 सेकंड की न्यूनतम सीमा एनोटेटरों को बदलाव पढ़े बिना भागने से रोकती है। इसे अपनी औसत ट्रेस लंबाई के हिसाब से तय करें।
कैलिब्रेशन उदाहरण दें। असली एनोटेशन से पहले सबसे एक ही 10-20 ट्रेस लेबल करवाएँ और जहाँ असहमति हुई वहाँ बात करें। इससे एकरूपता में बड़ा फ़र्क़ पड़ता है।