AI agents की साथ-साथ तुलना: Binary, Scale, और Multi-Dimension modes
Potato में तीन modes के साथ pairwise agent तुलना सेट करें: binary preference, continuous scale, और आवश्यक justification वाला प्रति-dimension multi-criteria निर्णय।
Agent मूल्यांकन के लिए pairwise तुलना क्यों
किसी coding agent trace को 1 से 10 के पैमाने पर rate करने को कहने से आपको शोर भरा data मिलता है, क्योंकि हर व्यक्ति उस scale को अलग तरह से अंशांकित करता है। एक annotator का 7 दूसरे का 5 होता है। Pairwise तुलना इस दिक़्क़त से बच निकलती है। Traces को अलग-अलग rate करने के बजाय annotators दो को साथ-साथ देखते हैं और बताते हैं कि कौन सी बेहतर है। ऐसा आमने-सामने का निर्णय लेना आसान होता है, लोगों के बीच ज़्यादा सुसंगत रहता है, और संयोग से ठीक वही है जो Direct Preference Optimization (DPO) और Reinforcement Learning from Human Feedback (RLHF) के लिए चाहिए।
यह वही तरीक़ा है जो language model alignment के लिए reward models train करने में इस्तेमाल होता है, और coding agents पर साफ़-साफ़ लागू हो जाता है: agent trajectories के जोड़ों के बीच मानवीय preferences जुटाएँ, उन पर reward model train करें, फिर उस model से agent training को दिशा दें या inference के समय N उम्मीदवारों में से सबसे अच्छा चुनें।
Potato में pairwise तुलना के तीन modes हैं, हर एक अलग मूल्यांकन ज़रूरत और data बजट के लिए उपयुक्त।
Interface दो traces को साथ-साथ रखता है:
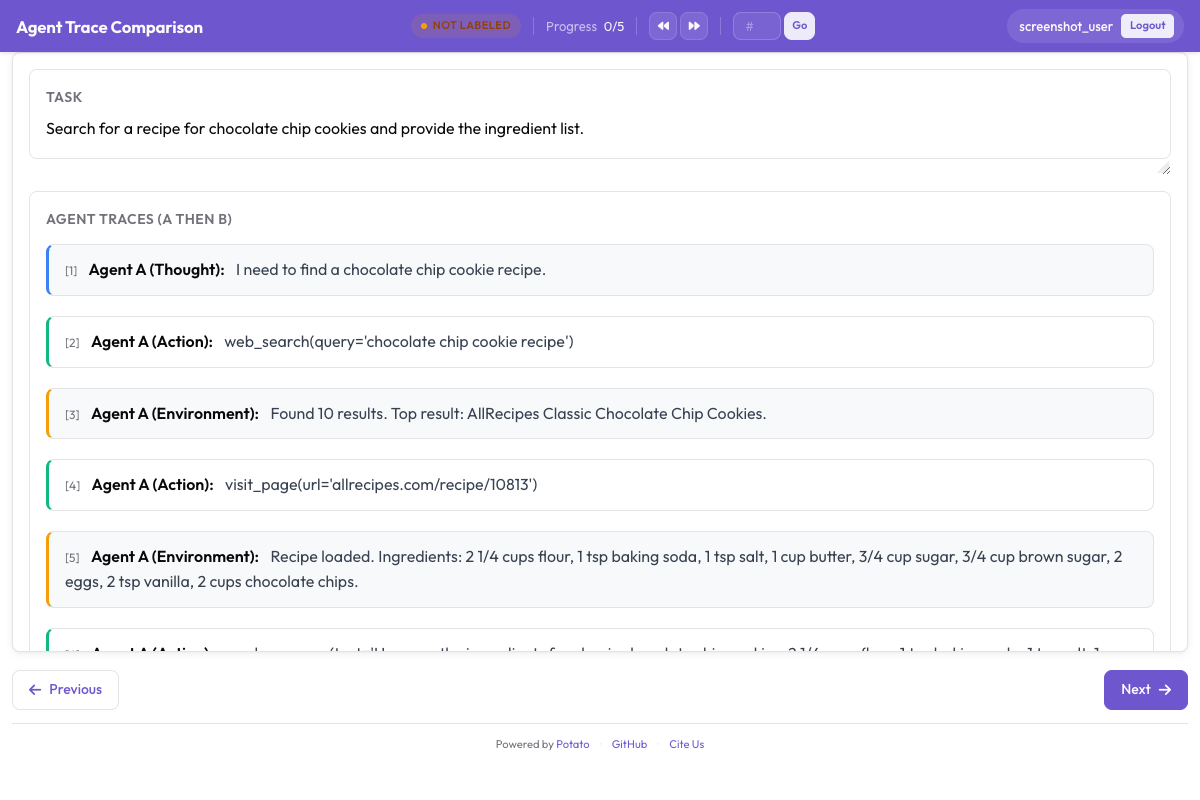 Annotators compare two agent traces and select which approach was better
Mode 1: binary preference
यह सबसे सरल और सबसे तेज़ mode है। Annotator दो traces साथ-साथ देखता है और बेहतर वाली पर click करता है। एक वैकल्पिक tie बटन उन मामलों को संभालता है जहाँ दोनों बराबर अच्छी या बराबर ख़राब हैं।
Binary mode कब उपयोग करें
Binary mode तब चुनें जब आपको जल्दी में बहुत सारा preference data चाहिए। यह बुनियादी reward models train करने, agent win rates निकालने, और Elo leaderboards बनाने के लिए अच्छा बैठता है। नुक़सान यह है कि बारीक़ी हाथ से निकल जाती है। आपको पता चलता है कि कौन सी trace जीती, पर यह नहीं कि कितने अंतर से या किन मोर्चों पर।
कॉन्फ़िगरेशन
# config.yaml
project_name: "Agent Comparison - Binary"
port: 8000

data:
  source: "local"
  input_path: "./data/paired_traces.jsonl"
  data_format: "paired_coding_trace"

coding_agent:
  display:
    diff_style: "unified"
    syntax_highlighting: true
    terminal_theme: "dark"
    file_tree:
      enabled: true
      position: "left"
    collapsible:
      auto_collapse_thinking: true

comparison:
  layout: "side_by_side"         # "side_by_side" or "tabbed"
  label_a: "Agent A"
  label_b: "Agent B"
  randomize_order: true          # Randomize which trace appears on which side
  show_agent_identity: false     # Hide agent names to avoid bias
  sync_scroll: false             # Independent scrolling for each trace

annotation_schemes:
  - annotation_type: pairwise
    name: preference
    description: "Which agent produced a better solution?"
    items_key:
      - value: "a"
        text: "Agent A is better"
        keyboard_shortcut: "1"
      - value: "b"
        text: "Agent B is better"
        keyboard_shortcut: "2"
      - value: "tie"
        text: "Tie (equally good or equally bad)"
        keyboard_shortcut: "3"
    allow_tie: true
  - annotation_type: radio
    name: confidence
    labels:
      - value: "high"
        text: "Very confident"
      - value: "medium"
        text: "Somewhat confident"
      - value: "low"
        text: "Not confident"

output:
  path: "./output/"
  format: "jsonl"

quality_control:
  inter_annotator_agreement: true
  overlap_percentage: 20
  attention_checks:

annotators:
  - username: "judge1"
  - username: "judge2"
Annotation का workflow
Annotator को एक बँटी हुई स्क्रीन मिलती है। बायीं ओर Trace A पूरे CodingTraceDisplay के साथ render होती है: diffs, terminal blocks, file reads, thinking। दायीं ओर उसी task के लिए Trace B। हर तरफ़ अपने आप scroll होती है।
Task का विवरण दोनों traces के ऊपर रहता है ताकि annotator को पता रहे कि दोनों agents क्या करने की कोशिश कर रहे थे।
उनके नीचे तीन बटन होते हैं: "Agent A is better", "Agent B is better", और "Tie"। randomize_order चालू होने पर हर instance में यह बदलता रहता है कि कौन सा agent A है और कौन सा B, इसलिए annotators बायीं या दायीं तरफ़ की आदत में नहीं पड़ सकते।
ज़्यादा बारीक़ मूल्यांकन के लिए interface कई dimensions का भी समर्थन करता है:
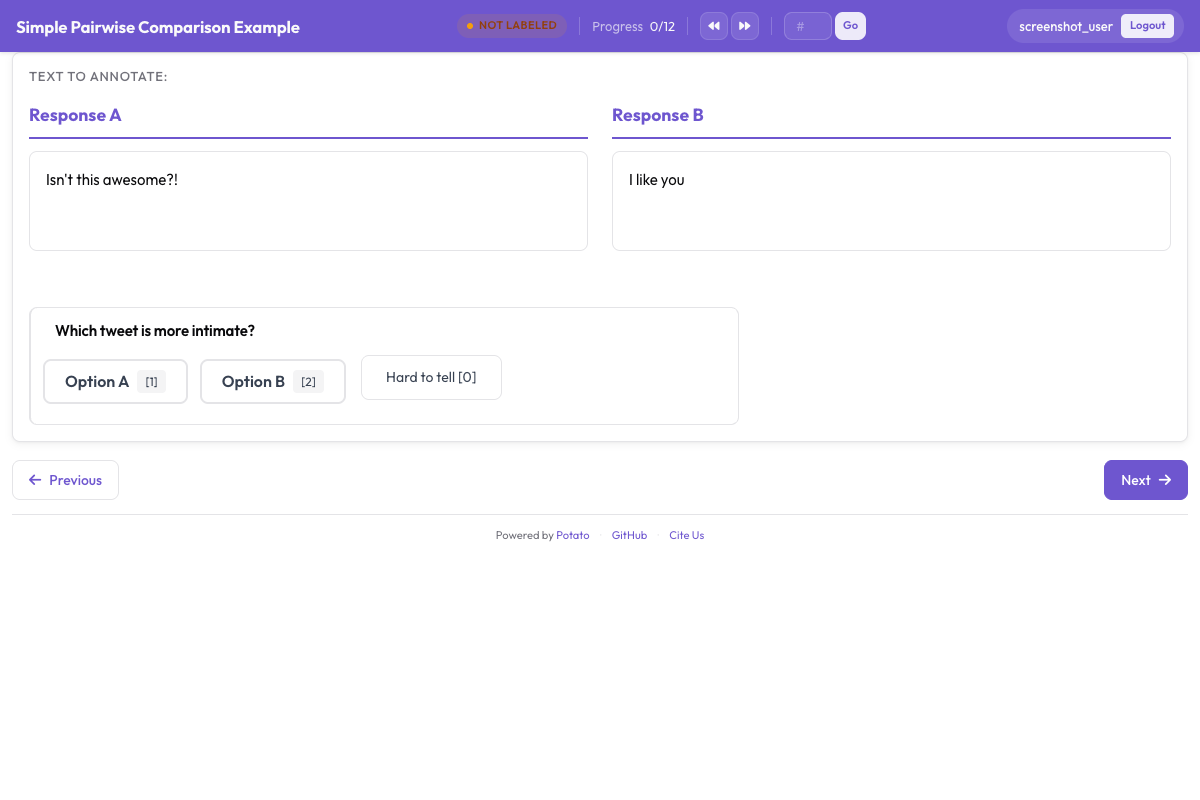 Binary preference, continuous scale, and multi-dimension modes are available
Mode 2: continuous scale
Scale mode annotator को यह बताने देता है कि एक trace कितनी बेहतर है, सिर्फ़ यह नहीं कि कौन सी जीती। एक click के बजाय वे एक slider खींचते हैं जो बायीं ओर "A much better" से दायीं ओर "B much better" तक जाता है, बीच में "Equal" के साथ।
Scale mode कब उपयोग करें
Scale mode तब उपयोग करें जब preference की दिशा के साथ-साथ उसकी तीव्रता भी मायने रखती हो। Slider का सिरे के पास होना साफ़ गुणवत्ता अंतर बताता है; केंद्र के पास होना बताता है कि दोनों क़रीब थे। DPO और उस जैसी pipelines उदाहरणों को उस तीव्रता के हिसाब से weight दे सकती हैं, और साफ़-साफ़ मामलों पर ज़्यादा टिक सकती हैं।
कॉन्फ़िगरेशन
# config.yaml
project_name: "Agent Comparison - Scale"
port: 8000

data:
  source: "local"
  input_path: "./data/paired_traces.jsonl"
  data_format: "paired_coding_trace"

coding_agent:
  display:
    diff_style: "unified"
    syntax_highlighting: true
    terminal_theme: "dark"
    file_tree:
      enabled: true
    collapsible:
      auto_collapse_thinking: true

comparison:
  layout: "side_by_side"
  randomize_order: true
  show_agent_identity: false

annotation_schemes:
  - annotation_type: pairwise
    name: preference_scale
    description: "Which agent produced a better solution, and by how much?"
    scale:
      points: 7                  # 7-point scale
      labels:
        1: "A is much better"
        2: "A is better"
        3: "A is slightly better"
        4: "Equal"
        5: "B is slightly better"
        6: "B is better"
        7: "B is much better"
      default: 4                 # Start at "Equal"
      show_numeric_value: true

output:
  path: "./output/"
  format: "jsonl"

quality_control:
  inter_annotator_agreement: true
  overlap_percentage: 20

annotators:
  - username: "judge1"
  - username: "judge2"
5-बिंदु scale का उपयोग
तेज़ annotation और थोड़ी कम बारीक़ी के लिए 5-बिंदु scale पर आ जाएँ:
annotation_schemes:
  - annotation_type: pairwise
    name: preference_scale_5
    description: "Compare the two solutions"
    scale:
      points: 5
      labels:
        1: "A is clearly better"
        2: "A is somewhat better"
        3: "About equal"
        4: "B is somewhat better"
        5: "B is clearly better"
      default: 3
Mode 3: multi-dimension तुलना
यह सबसे विस्तृत mode है। एक समग्र preference के बजाय annotator हर trace को कई स्वतंत्र dimensions पर परखता है। हर dimension को अपना A/B/Tie निर्णय मिलता है, और हर निर्णय के साथ लिखित justification ज़रूरी है।
Multi-dimension mode कब उपयोग करें
इसका उपयोग तब करें जब आप जानना चाहते हैं कि कौन सा agent जीता ही नहीं, बल्कि क्यों जीता। एक trace में code सही हो सकता है पर efficiency बेहद ख़राब; दूसरी efficient हो सकती है पर किसी edge case को अनदेखा कर दे। इससे निकलने वाला प्रति-dimension data dimension-विशिष्ट reward models train कर सकता है या agent बनाने वालों तक विस्तृत टिप्पणियाँ पहुँचा सकता है।
कॉन्फ़िगरेशन
# config.yaml
project_name: "Agent Comparison - Multi-Dimension"
port: 8000

data:
  source: "local"
  input_path: "./data/paired_traces.jsonl"
  data_format: "paired_coding_trace"

coding_agent:
  display:
    diff_style: "unified"
    syntax_highlighting: true
    terminal_theme: "dark"
    file_tree:
      enabled: true
    collapsible:
      auto_collapse_thinking: true

comparison:
  layout: "side_by_side"
  randomize_order: true
  show_agent_identity: false

annotation_schemes:
  - annotation_type: pairwise
    name: multi_dim_comparison
    description: "Compare the two solutions along each dimension"

      - name: "efficiency"
        label: "Efficiency"
        description: >
          How efficient is the agent's process? Does it take unnecessary
          steps, read irrelevant files, or make redundant edits?
        options: ["A", "B", "Tie"]
        require_justification: true
        justification_placeholder: "Which agent was more efficient and why?"
        weight: 0.2

      - name: "code_quality"
        label: "Code Quality"
        description: >
          Is the code well-written? Consider readability, naming,
          error handling, documentation, and adherence to existing patterns.
        options: ["A", "B", "Tie"]
        require_justification: true
        justification_placeholder: "Which produces better quality code?"
        weight: 0.2

      - name: "communication"
        label: "Communication"
        description: >
          How well does the agent explain its reasoning? Are its thinking
          steps clear and logical? Does it identify the root cause?
        options: ["A", "B", "Tie"]
        require_justification: true
        justification_placeholder: "Which agent communicates its approach better?"
        weight: 0.1

      - name: "robustness"
        label: "Robustness"
        description: >
          Does the solution handle edge cases? Does the agent verify its
          changes with tests? Is the fix narrow and targeted or fragile?
        options: ["A", "B", "Tie"]
        require_justification: true
        justification_placeholder: "Which solution is more robust?"
        weight: 0.1


output:
  path: "./output/"
  format: "jsonl"

quality_control:
  inter_annotator_agreement: true
  overlap_percentage: 25         # Higher overlap for this detailed task
  minimum_time_per_instance: 120 # 2 minutes minimum for thorough review

annotators:
  - username: "judge1"
  - username: "judge2"
Paired trace data तैयार करना
तीनों modes input के रूप में paired traces लेते हैं। JSONL file की हर पंक्ति में दो traces होती हैं जिन्होंने एक ही task का प्रयास किया।
Data format
{
  "id": "pair_001",
  "task_description": "Fix the IndexError in process_batch() when the input list is empty",
  "repo": "myorg/myproject",
  "trace_a": {
    "agent": "claude_code",
    "model": "claude-sonnet-4-20250514",
    "structured_turns": [
      {
        "step_idx": 0,
        "type": "file_read",
        "path": "src/batch.py",
        "content": "def process_batch(items):\n    result = items[0]\n    ...",
        "start_line": 10,
        "end_line": 25
      },
      {
        "step_idx": 1,
        "type": "file_edit",
        "path": "src/batch.py",
        "diff": "--- a/src/batch.py\n+++ b/src/batch.py\n@@ -10,3 +10,5 @@\n def process_batch(items):\n+    if not items:\n+        return []\n     result = items[0]\n"
      },
      {
        "step_idx": 2,
        "type": "bash_command",
        "command": "python -m pytest tests/test_batch.py -v",
        "output": "PASSED",
        "exit_code": 0
      }
    ]
  },
  "trace_b": {
    "agent": "swe_agent",
    "model": "gpt-4o",
    "structured_turns": [
      {
        "step_idx": 0,
        "type": "bash_command",
        "command": "find . -name '*.py' | xargs grep 'process_batch'",
        "output": "src/batch.py:def process_batch(items):\ntests/test_batch.py:    process_batch([])",
        "exit_code": 0
      },
      {
        "step_idx": 1,
        "type": "file_read",
        "path": "src/batch.py",
        "content": "def process_batch(items):\n    result = items[0]\n    ...",
        "start_line": 1,
        "end_line": 50
      },
      {
        "step_idx": 2,
        "type": "file_edit",
        "path": "src/batch.py",
        "diff": "--- a/src/batch.py\n+++ b/src/batch.py\n@@ -10,3 +10,6 @@\n def process_batch(items):\n+    if items is None or len(items) == 0:\n+        logger.warning('Empty input to process_batch')\n+        return []\n     result = items[0]\n"
      },
      {
        "step_idx": 3,
        "type": "bash_command",
        "command": "python -m pytest tests/ -v",
        "output": "PASSED (12 tests)",
        "exit_code": 0
      }
    ]
  }
}
अलग-अलग traces से जोड़े बनाना
अगर आपके पास अलग-अलग traces हैं जिन्होंने वही tasks किए हैं, तो pairing utility उन्हें जोड़ देगी:
# Generate all possible pairs for each task
potato pair-traces \
  --input ./data/individual_traces.jsonl \
  --output ./data/paired_traces.jsonl \
  --pair_by "task_id" \
  --strategy "all_pairs"

# Or sample a fixed number of pairs per task
potato pair-traces \
  --input ./data/individual_traces.jsonl \
  --output ./data/paired_traces.jsonl \
  --pair_by "task_id" \
  --strategy "sample" \
  --pairs_per_task 3
तुलना data निर्यात करना
DPO/RLHF preference जोड़े
Pairwise तुलनाओं का मुख्य निर्यात format DPO या RLHF training के लिए preference जोड़े हैं:
potato export \
  --format dpo_preferences \
  --project ./output/ \
  --output ./training_data/preferences.jsonl
Binary mode के लिए output सरल रहता है:
{
  "prompt": "Fix the IndexError in process_batch() when the input list is empty",
  "chosen": {"agent": "claude_code", "trace_id": "trace_a_001", "steps": [...]},
  "rejected": {"agent": "swe_agent", "trace_id": "trace_b_001", "steps": [...]},
  "annotator": "judge1",
  "confidence": "high"
}
Scale mode preference की तीव्रता भी जोड़ देता है:
{
  "prompt": "Fix the IndexError in process_batch()",
  "chosen": {"agent": "claude_code", "trace_id": "trace_a_001"},
  "rejected": {"agent": "swe_agent", "trace_id": "trace_b_001"},
  "preference_strength": 0.83,
  "scale_value": 2,
  "justification": "Agent A found and fixed the bug in fewer steps with cleaner code"
}
Multi-dimension mode प्रति-dimension preferences साथ लेकर चलता है:
{
  "prompt": "Fix the IndexError in process_batch()",
  "chosen": {"agent": "claude_code", "trace_id": "trace_a_001"},
  "rejected": {"agent": "swe_agent", "trace_id": "trace_b_001"},
  "overall_preference": "A",
  "dimensions": {
    "correctness": {"preference": "Tie", "justification": "Both correctly fix the bug"},
    "efficiency": {"preference": "A", "justification": "A solves it in 3 steps vs 4"},
    "code_quality": {"preference": "B", "justification": "B adds logging and handles None"},
    "communication": {"preference": "A", "justification": "A's reasoning is more focused"},
    "robustness": {"preference": "B", "justification": "B runs full test suite, not just one file"}
  },
  "weighted_score_a": 0.55,
  "weighted_score_b": 0.45
}
विश्लेषण: win rates, Elo ratings, और प्रति-dimension विवरण
Win rates निकालना
import json
from collections import defaultdict

with open("training_data/preferences.jsonl") as f:
    prefs = [json.loads(line) for line in f]

wins = defaultdict(lambda: {"wins": 0, "losses": 0, "ties": 0})

for pref in prefs:
    agent_chosen = pref["chosen"]["agent"]
    agent_rejected = pref["rejected"]["agent"]

    if agent_chosen == agent_rejected:
        continue  # Skip self-comparisons

    if pref.get("overall_preference") == "Tie":
        wins[agent_chosen]["ties"] += 1
        wins[agent_rejected]["ties"] += 1
    else:
        wins[agent_chosen]["wins"] += 1
        wins[agent_rejected]["losses"] += 1

print("Agent Win Rates:")
print("-" * 55)
for agent, record in sorted(wins.items()):
    total = record["wins"] + record["losses"] + record["ties"]
    win_rate = (record["wins"] + 0.5 * record["ties"]) / total * 100
    print(f"  {agent:<20} {win_rate:5.1f}%  "
          f"(W:{record['wins']} L:{record['losses']} T:{record['ties']})")
Elo ratings निकालना
import json
import math
from collections import defaultdict

def compute_elo(preferences, k=32, initial_rating=1500):
    """Compute Elo ratings from pairwise preferences."""
    ratings = defaultdict(lambda: initial_rating)

    for pref in preferences:
        agent_a = pref["chosen"]["agent"]
        agent_b = pref["rejected"]["agent"]

        ra = ratings[agent_a]
        rb = ratings[agent_b]

        # Expected scores
        ea = 1.0 / (1.0 + math.pow(10, (rb - ra) / 400))
        eb = 1.0 / (1.0 + math.pow(10, (ra - rb) / 400))

        overall = pref.get("overall_preference", "A")
        if overall == "Tie":
            sa, sb = 0.5, 0.5
        else:
            # "chosen" is the winner
            sa, sb = 1.0, 0.0

        ratings[agent_a] = ra + k * (sa - ea)
        ratings[agent_b] = rb + k * (sb - eb)

    return dict(ratings)

with open("training_data/preferences.jsonl") as f:
    prefs = [json.loads(line) for line in f]

ratings = compute_elo(prefs)

print("Elo Ratings:")
print("-" * 35)
for agent, rating in sorted(ratings.items(), key=lambda x: -x[1]):
    print(f"  {agent:<20} {rating:.0f}")
प्रति-dimension विवरण
Multi-dimension तुलनाओं के लिए देखें कि हर agent किन dimensions पर अच्छा करता है:
import json
from collections import defaultdict

with open("training_data/preferences.jsonl") as f:
    prefs = [json.loads(line) for line in f]

# Only process multi-dimension annotations
multi_dim = [p for p in prefs if "dimensions" in p]

dim_wins = defaultdict(lambda: defaultdict(lambda: {"A": 0, "B": 0, "Tie": 0}))

for pref in multi_dim:
    agent_a = pref["chosen"]["agent"]
    agent_b = pref["rejected"]["agent"]
    pair_key = f"{agent_a} vs {agent_b}"

    for dim_name, dim_data in pref["dimensions"].items():
        dim_wins[dim_name][pair_key][dim_data["preference"]] += 1

print("Per-Dimension Win Rates:")
print("=" * 60)
for dim_name, matchups in sorted(dim_wins.items()):
    print(f"\n  {dim_name.upper()}")
    print(f"  {'-' * 50}")
    for pair, counts in matchups.items():
        total = counts["A"] + counts["B"] + counts["Tie"]
        a_rate = (counts["A"] + 0.5 * counts["Tie"]) / total * 100
        print(f"    {pair}: A={a_rate:.0f}% B={100-a_rate:.0f}%  "
              f"(A:{counts['A']} B:{counts['B']} Tie:{counts['Tie']})")
व्यवहार में क्या काम करता है
Mode चुनना
Binary mode तब सही चुनाव है जब आपको जल्दी हज़ारों preferences चाहिए, एक सामान्य-प्रयोजन reward model चाहिए, या एक leaderboard रैंकिंग चाहिए। प्रति तुलना लगभग 1 से 2 मिनट मानकर चलें।
Scale mode तब अपनी क़ीमत वसूल करता है जब preference की तीव्रता आपकी training pipeline में जाती है। Margin weighting वाला DPO इस अंतर की परवाह करता है कि preference मज़बूत है (slider सिरे पर) या कमज़ोर (slider केंद्र के पास)। प्रति तुलना 2 से 3 मिनट मानकर चलें।
Multi-dimension mode अतिरिक्त समय के लायक़ तब है जब आपको जानना हो कि agents कहाँ मज़बूत और कहाँ कमज़ोर हैं, जब आप dimension-विशिष्ट reward models train कर रहे हों, या जब आपको agent developers को विस्तृत रिपोर्ट देनी हो। प्रति तुलना 4 से 6 मिनट मानकर चलें।
कितनी तुलनाएँ चाहिए
भरोसेमंद win rates के लिए हर agent जोड़े पर कम से कम 100 तुलनाएँ जुटाएँ। पाँच या ज़्यादा agents पर Elo ratings के लिए कुल 200 से 300 तुलनाओं में रैंकिंग स्थिर हो जाती है। DPO reward models के लिए 1,000 या उससे ज़्यादा preference जोड़ों का लक्ष्य रखें, जो आसान और कठिन दोनों tasks पर फैले हों।
क्रम को यादृच्छिक करना
randomize_order: true हमेशा सेट करें। Position bias, यानी बायीं ओर या पहले tab में दिखने वाली trace को पसंद करने की प्रवृत्ति, मानव मूल्यांकन अध्ययनों में अच्छी तरह दर्ज है। इस यादृच्छिकीकरण के साथ attention_checks.type: "duplicate_reversed" जाँच भी लगाएँ ताकि जो लोग बस एक ही तरफ़ click करते रहते हैं वे पकड़ में आ जाएँ।
Ties संभालना
Binary mode में ties की अनुमति दें पर tie दर पर नज़र रखें। अगर वह 30% से ऊपर जाती है, तो agents शायद binary निर्णय के लिए बहुत क़रीब हैं और आपको scale या multi-dimension mode पर जाना चाहिए। Scale mode में ties बस केंद्र बिंदु हैं। Multi-dimension mode में व्यक्तिगत dimensions पर ties अपेक्षित हैं और आपको कुछ बताती हैं।
Agent की पहचान छिपाना
show_agent_identity: false ही रखें, जब तक उसे दिखाने की कोई ठोस वजह न हो। अगर annotators को पता हो कि कोई trace किस agent ने बनाई है, तो वे उसी का पक्ष लेने लगते हैं जिसे वे पहले से बेहतर मानते हैं।
Modes को जोड़ना
गहन मूल्यांकन के लिए पहले जोड़ों के एक बड़े समूह पर binary mode चलाएँ ताकि समग्र रैंकिंग मिल जाए, फिर एक छोटे, स्तरीकृत उपसमुच्चय पर multi-dimension mode चलाएँ ताकि विवरण मिल सके। Binary तुलनाएँ reward model training में जाती हैं; multi-dimension वाली बताती हैं कि agent में सुधार कहाँ पर करना है।
इन modes के पीछे के configuration reference के लिए स्रोत दस्तावेज़ देखें। Agents के सिरे से सिरे तक मूल्यांकन के व्यापक walkthrough के लिए agent evaluation guide से शुरू करें।