Drawing Bounding Boxes for Object Detection
Set up bounding box annotation for computer vision in Potato, configure label colors, minimum box size, multi-class support, validation rules, and COCO/YOLO export.
If you are training an object detector, you need bounding boxes. This tutorial starts with a minimal setup and builds up to attributes, validation rules, and a full production config. For the image options behind it, see the image annotation documentation.
Basic Bounding Box Setup
Minimal Configuration
annotation_task_name: "Object Detection Annotation"

data_files:
  - "data/images.json"

annotation_schemes:
  - annotation_type: image_annotation
    name: objects
    description: "Draw boxes around all objects"
    tools:
      - bbox
    labels:
      - name: car
        color: "#FF6B6B"
      - name: person
        color: "#4ECDC4"
      - name: bicycle
        color: "#45B7D1"
How It Works
- Select a label from the toolbar
- Click and drag to draw a box
- Adjust corners to refine the box
- Add more boxes as needed
- Submit when done
Annotators draw bounding boxes directly on images with a click-and-drag interface:
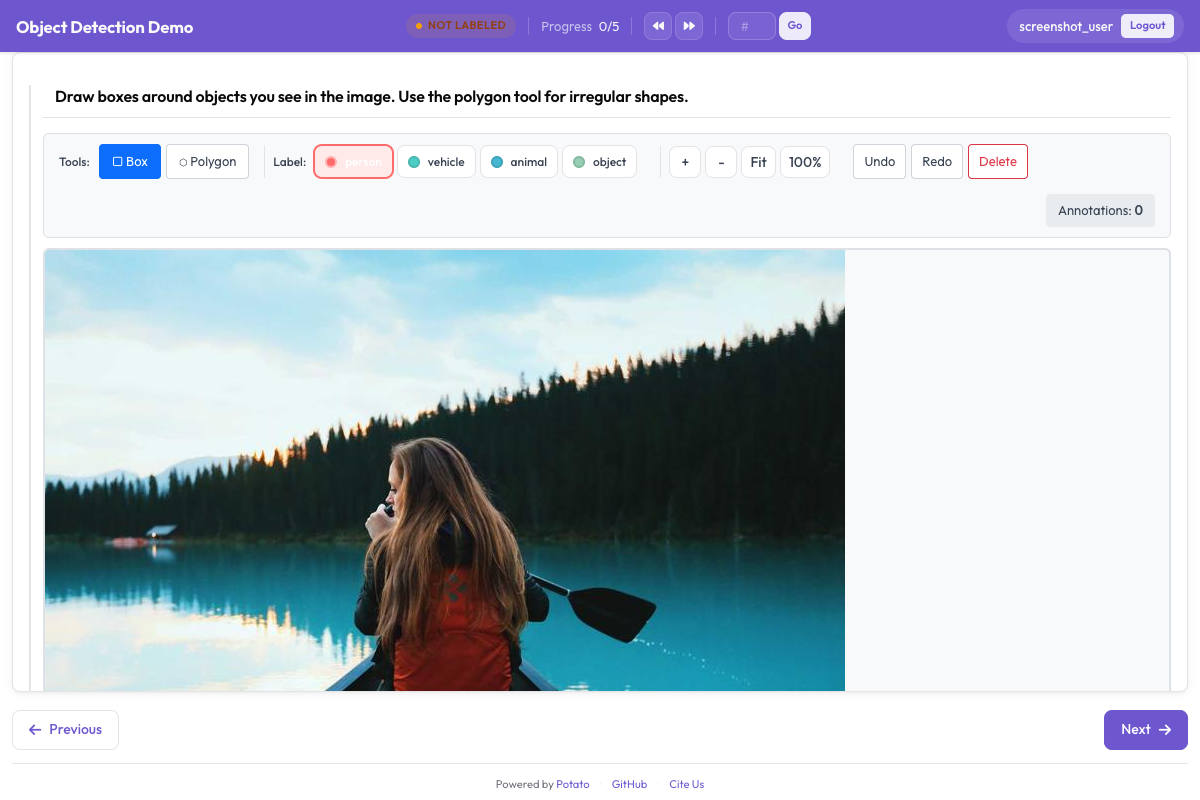 The bounding box tool lets annotators draw and label rectangular regions on images
Detailed Label Configuration
annotation_schemes:
  - annotation_type: image_annotation
    name: objects
    description: "Annotate all visible objects"
    tools:
      - bbox
    labels:
      - name: person
        color: "#FF6B6B"
        description: "Any human, partial or full"
        keyboard_shortcut: "p"

      - name: car
        color: "#4ECDC4"
        description: "Cars, trucks, SUVs"
        keyboard_shortcut: "c"

      - name: motorcycle
        color: "#45B7D1"
        description: "Motorcycles and scooters"
        keyboard_shortcut: "m"

      - name: bicycle
        color: "#96CEB4"
        description: "Bicycles of all types"
        keyboard_shortcut: "b"

      - name: traffic_light
        color: "#FFEAA7"
        description: "Traffic signals"
        keyboard_shortcut: "t"

      - name: stop_sign
        color: "#DDA0DD"
        description: "Stop signs"
        keyboard_shortcut: "s"
Adding Object Attributes
Capture additional information about each box:
annotation_schemes:
  - annotation_type: image_annotation
    name: objects
    tools:
      - bbox
    labels:
      - name: person
        color: "#FF6B6B"
        attributes:
          - name: occlusion
            type: radio
            options: [none, partial, heavy]
          - name: truncated
            type: checkbox
            description: "Object extends beyond image"
          - name: difficult
            type: checkbox
            description: "Hard to identify"
When annotators draw a box, they'll be prompted to fill in these attributes.
Validation Rules
Ensure annotation quality with validation:
annotation_schemes:
  - annotation_type: image_annotation
    name: objects
    tools:
      - bbox
    labels: [...]
    min_annotations: 1
Keyboard Shortcuts
Potato includes built-in keyboard shortcuts for efficient annotation:
- Number keys select labels
- Delete removes selected annotations
- Arrow keys navigate between items
Display Options
Configure image display settings:
image_display:
  width: 800
  height: 600
Complete Production Configuration
annotation_task_name: "Autonomous Driving - Object Detection"

data_files:
  - "data/driving_frames.json"

annotation_schemes:
  - annotation_type: image_annotation
    name: objects
    description: "Annotate all traffic participants and objects"
    tools:
      - bbox
    min_annotations: 1
    labels:
      - name: vehicle
        color: "#FF6B6B"
        keyboard_shortcut: "v"
        attributes:
          - name: type
            type: radio
            options: [car, truck, bus, motorcycle, bicycle]
          - name: occlusion
            type: radio
            options: [0%, 1-25%, 26-50%, 51-75%, 76-99%]

      - name: pedestrian
        color: "#4ECDC4"
        keyboard_shortcut: "p"
        attributes:
          - name: pose
            type: radio
            options: [standing, walking, sitting, lying]
          - name: age_group
            type: radio
            options: [child, adult, elderly]

      - name: cyclist
        color: "#45B7D1"
        keyboard_shortcut: "c"

      - name: traffic_sign
        color: "#FFEAA7"
        keyboard_shortcut: "t"
        attributes:
          - name: sign_type
            type: radio
            options: [stop, yield, speed_limit, warning, other]

      - name: traffic_light
        color: "#DDA0DD"
        keyboard_shortcut: "l"
        attributes:
          - name: state
            type: radio
            options: [red, yellow, green, off, unknown]
Output Format
{
  "frame_id": "frame_0001",
  "frame_path": "/images/frame_0001.jpg",
  "image_dimensions": {"width": 1920, "height": 1080},
  "annotations": {
    "objects": [
      {
        "label": "vehicle",
        "bbox": [450, 380, 680, 520],
        "attributes": {
          "type": "car",
          "occlusion": "0%"
        }
      },
      {
        "label": "pedestrian",
        "bbox": [820, 400, 870, 550],
        "attributes": {
          "pose": "walking",
          "age_group": "adult"
        }
      }
    ]
  }
}
Tips for Quality Bounding Boxes
Draw boxes tight to the object so you are not feeding the model a lot of background. Write down how to handle the awkward cases (occlusion, objects cut off at the edge) and review a batch of examples together early on so everyone draws them the same way. Keep an eye on box counts and size distributions; a sudden shift usually means someone is interpreting the rules differently.
Next Steps
- Add polygon annotation for precise segmentation
- Learn about keypoint detection for pose estimation
- Set up quality control for reliable annotations
Full documentation at /docs/features/image-annotation.